
|

|
Forum Index : Electronics : Inverter PCB’s
| Author | Message | ||||
| tinyt Guru Joined: 12/11/2017 Location: United StatesPosts: 438 |
Hi Gary, Can you post pdfs of your charge regulator? If I may I would like to make a schematic during my spare time for reference. Thanks. |
||||
Madness Guru Joined: 08/10/2011 Location: AustraliaPosts: 2498 |
PDFs attached.2018-06-18_075520_Silk.pdf 2018-06-18_075654_Bottom.pdf 2018-06-18_075729_Top.pdf There are only 10 types of people in the world: those who understand binary, and those who don't. |
||||
Madness Guru Joined: 08/10/2011 Location: AustraliaPosts: 2498 |
There are only 10 types of people in the world: those who understand binary, and those who don't. |
||||
| mason Regular Member Joined: 07/11/2015 Location: CanadaPosts: 86 |
thanks for the part list Madness, Is the code that you posted last year good for the new version of your Charge Regulator? Neil |
||||
Madness Guru Joined: 08/10/2011 Location: AustraliaPosts: 2498 |
Hi Neil, The Arduino Code is evolving, there is quite a bit I want to add to it yet. ATM I am waiting on another current sensor to arrive to do more with it, the one I had failed due to voltage spike from the step-down power supply. Hence why I mentioned needing Zener Diodes to prevent that from happening. Here is what I am using now it works very well as it is and nothing more is needed if you don't want any extra functionality bells and whistles. The latest order of PCBs are supposed to arrive here on Friday, I will do a new thread on how to assemble the Charge Regulator over the weekend. [code] // Get 1-wire Library here: http://www.pjrc.com/teensy/td_libs_OneWire.html #include <OneWire.h> #include <PID_v1.h> #include <avr/wdt.h> //Get DallasTemperature Library here: http://milesburton.com/Main_Page?title=Dallas_Temperature_Control_Library #include <DallasTemperature.h> // Wire (I2C) Library #include <Wire.h> #include <Adafruit_ADS1015.h> Adafruit_ADS1115 ads(0x48); /*-----( Declare Constants and Pin Numbers )-----*/ // Data wire is plugged into port 8 on the Arduino (can be changed) #define ONE_WIRE_BUS 7 // NOTE: No ";" on #define // Setup a oneWire instance to communicate with any OneWire devices // (not just Maxim/Dallas temperature ICs) OneWire oneWire(ONE_WIRE_BUS); // Pass address of our oneWire instance to Dallas Temperature. DallasTemperature sensors(&oneWire); #include <LiquidCrystal_I2C.h> // Start the LCD display library LiquidCrystal_I2C lcd(0x27, 2, 1, 0, 4, 5, 6, 7, 3, POSITIVE); // Set the LCD I2C address 0x3F or 0x27 //===========================MAIN CHARGER SETTINGS, REFER TO YOUR BATTERY MANUAL================================================================== float batv = 48; // nominal battery voltage 24 OR 48, could work with 12V with 18v power supply for FET driver chips on pcb double floatVolts = 54.0; // User setting for the FLOAT voltag double absorbCharge = 59.2; // User setting for the ABSORPTION voltage long timedOut = 200; // ABSORPTION MINUTES int startAllOverAgain = 51.5; // User setting for resetting the charge cycle, usually overnight or after heavy drawdown int startOverTime = 5; //?? Minutes below Start over voltage to take effect int Ventfanvolts = 51.0; // Turn on battery vent fan //===========================ADVANCED SETTINGS=================================================================================================== float R1 = 105000.0; // resistance of R1 (100K) float R2 = 8000.0; // resistance of R2 (8K2) For setting up voltage divider to get correct voltage reading Use in conjunction with trim pot on pcb int pwmmin = 12; // Minimum Output level 0 = will go as low as no output, set higher WITH CAUTION if you want to stop a GTI from restarting during the day if unsure leave at zero int SOTimer = 0; const int numReadings = 10; int readings; // the readings from the analog input int readIndex = 0; // the index of the current reading int total = 0; // the running total int average = 0; // the average double Setpoint = 0; //int voltsinputPin = 3; double battemp; double tcomp; double tcomp1; double volts = 0.0; double vin = 0.0; int value = 0; long fullTime = 0; // timer for float stage int PWMout1 = 5; // fet driver connected to this pin int PWMout2 = 6; // fet driver connected to this pin int PWMHW = 10; //PWM Output to Hot Water Heater SSR int PWMLOAD = 11; //PWM Output to Load SSR double pulseVal = 0; // initilise the pulse width to zero of 255 double hwval = 0; long absorbTime = 0; // initialise the time to zero for the absorb int weAreHereNow = 0; // initialize the start stage as zero int weWhereHere = 0; unsigned long start, finished, elapsed; unsigned long astart, afinished, aelapsed, apause, fstart; boolean r = false; const int buttonFloat = 9; // the number of the pushbutton pin const int buttonAbsorb = 8; // the number of the pushbutton pin int buttonFState = 0; int buttonAState = 0; double Kp = 55, Ki = 24, Kd = 1; PID myPID(&vin, &pulseVal, &Setpoint, Kp, Ki, Kd, DIRECT); void setup() { Serial.begin(9600); sensors.begin(); ads.begin(); // initialize all the readings to 0: { lcd.begin(20, 4); pinMode(PWMout1, OUTPUT); pinMode(PWMout2, OUTPUT); // sets the pin 6 as an output for the fet drive pinMode(PWMHW, OUTPUT); pinMode(PWMLOAD, OUTPUT); pinMode(A0, OUTPUT); //Vent Fan Output pinMode(A1, OUTPUT); } myPID.SetMode(AUTOMATIC); wdt_enable(WDTO_4S); //Enable watchdog to reset if not restarted within 4 seconds } void loop() { wdt_reset(); //Resets Watchdog If the NANO hangs this will cause a reset if the timer is not restarted int16_t adc0, adc3; adc0 = ads.readADC_SingleEnded(0); adc3 = ads.readADC_SingleEnded(3); { // subtract the last reading: total = total - readings; // read from the sensor: readings = adc3; // add the reading to the total: total = total + readings; // advance to the next position in the array: readIndex = readIndex + 1; // if we're at the end of the array... if (readIndex >= numReadings) { // ...wrap around to the beginning: readIndex = 0; } // calculate the average: average = total / numReadings; volts = average; vin = volts / 39; // Voltage divider calculation } buttonFState = digitalRead(buttonFloat); buttonAState = digitalRead(buttonAbsorb); if (buttonFState == HIGH) { weAreHereNow = 2; }// Enter float mode: if (buttonAState == HIGH) { weAreHereNow = 1; }// Enter Absorb mode: sensors.requestTemperatures(); // Send the command to get temperature readings battemp = (sensors.getTempCByIndex(0)); // convert sensor value to degrees celcius if (battemp == -127.00) // Measurement failed or no device found, if no temp sensor temperature comp has no effect { battemp = tcomp1; // prevents error if sensor fails to return a result occasionally } else { tcomp = (25 - battemp) * (batv * 0.0025); //used to calculate voltage set point with temperature compensation applied tcomp1 = battemp; } lcd.setCursor(0, 0); lcd.print("Batt V = "); //Serial.print ("Batt V = "); lcd.setCursor(9, 0); lcd.print(vin); //Actual battery volts //Serial.println (vin); lcd.setCursor(15, 0); lcd.print("C"); lcd.setCursor(16, 0); lcd.print(tcomp); //Temperature compensation voltage adjustment value add or subtract for difference from 25 degrees lcd.setCursor(0, 2); lcd.print("P% "); lcd.setCursor(2, 2); lcd.print(pulseVal / 2.55, 0); // print the PWM out as a percentage from 0 - 100 (100% = charging at full avaiable power)lcd.print(fanpwmH / 2.55, 0); // Serial.print ("PWM % = "); //Serial.println(pulseVal / 2.55); // print the PWM out as a percentage from 0 - 100 (100% = charging at full avaiable power) lcd.setCursor(9, 2); lcd.print("HW% "); lcd.setCursor(11, 2); lcd.print(hwval / 2.55, 0); { if (vin < startAllOverAgain ) //charge cylce starts here { lcd.setCursor(0, 1); lcd.print("Pre-bulk volts "); start = millis(); //sets start time for when bulk charge starts Setpoint = 60; } if (weAreHereNow == 0 && vin > startAllOverAgain) // if stage 1 then we do this routine { lcd.setCursor(0, 1); lcd.print("Bulk = "); lcd.setCursor (8, 1); lcd.print((millis() - start) / 60000); // Displays how many minutes since bulk charge started lcd.print(" min"); Setpoint = 60; } if (weAreHereNow == 1) // if stage 2 then we do this screen routine { lcd.setCursor(0, 1); lcd.print("Absorb "); lcd.setCursor (7, 1); lcd.print(absorbTime); // Display minutes actually at absorb voltage lcd.setCursor (11, 1); lcd.print("< Abs"); lcd.setCursor (17, 1); lcd.print(apause / 60000); // Display minutes below absorb voltage since absorb started } if (weAreHereNow == 2) { lcd.setCursor(0, 1); lcd.print("Float = "); lcd.setCursor (9, 1); lcd.print(fullTime); // Display minutes since float was started lcd.setCursor (10, 1); lcd.print(" min "); lcd.print (SOTimer); } lcd.setCursor(0, 3); lcd.print("BTemp"); lcd.setCursor (6, 3); lcd.print (battemp); // Display actual battery temperature lcd.setCursor (13, 3); lcd.print (Setpoint); } if (vin >= (absorbCharge + tcomp) && weAreHereNow == 0) // if we achieve 59v (bulk chg) AND we were in stage zero then change weAreHereNow to 1 as a flag ie absorb { weAreHereNow = 1; // weAreHereNow=1 is absorb status } //=============bulk routine============== if ( weAreHereNow == 0) // if in stage 1 then check voltage against bulk charge constant ... can be set in definitions { pulseVal = 255; // was not up to bulkCharge, then increase pulse width incrementally astart = millis(); //sets start time for when absorb charge starts Setpoint = 60; } //==========absord routine============== if ( weAreHereNow == 1 ) // if we are in absorb then do this { if (vin >= ((absorbCharge + tcomp) - 0.5)) { // This section is keep track of the time at or just under absorb voltage aelapsed = ((millis() - astart) - apause); // aelapsed = time from the absorb cycle starting less the time below (absorbCharge + tcomp) - 0.5) afinished = millis() - apause; // afinished is used to calculate time below absorb absorbTime = (aelapsed) / 60000; // convert time to minutes } else { apause = (millis() - afinished); //time below absorb set point since absorb started } if (absorbTime >= timedOut) // once we reach timedOut, we have finished our absorb sequence, change status flag weAreHereNow to 2, and change the voltage now to float value { weAreHereNow = 2; fstart = millis(); } Setpoint = (absorbCharge + tcomp); myPID.Compute(); // if ( pulseVal <= pwmmin) // { // pulseVal = pwmmin; // } } //=========float routine======= if ( weAreHereNow == 2) // are we in float charge stage { if (vin > ((floatVolts + tcomp) - 0.5)) { fullTime = (millis() - fstart) / 60000; // increment float timer } Setpoint = (floatVolts + tcomp); myPID.Compute(); // if ( pulseVal <= pwmmin) // { // pulseVal = pwmmin; // } } //==============================write the pulse to the fet====================== analogWrite (PWMout2, pulseVal); lcd.setCursor(6, 2); lcd.print(" "); lcd.setCursor(6, 2); lcd.print(pulseVal / 2.55, 0); if ( pulseVal <= pwmmin) { pulseVal = pwmmin; } analogWrite (PWMout1, pulseVal); // actually write the data to the fet via pin 5 ... if (vin > (Setpoint - 0.2)) { hwval = (hwval + 2); } if (vin < (Setpoint - 0.4)) { hwval = (hwval - 7); } hwval = constrain(hwval, 0, 255); analogWrite (PWMHW, hwval); if (vin <= (Ventfanvolts - 0.5)) { digitalWrite(A0, LOW); lcd.setCursor(18, 2); lcd.print(" "); } if (vin >= Ventfanvolts) { digitalWrite(A0, HIGH); lcd.setCursor(18, 2); lcd.print("VF"); } if (vin <= (Ventfanvolts - 0.5)) { digitalWrite(A0, LOW); } //============================================= // if (vin < (startAllOverAgain))// && (SOTimer == 0)) // Voltage level to restart charge cycle when voltage drops below threshold due to night or very heavy load //{ // SOTimer = millis(); //} //if (vin => (startAllOverAgain)) //{ // SOTimer = 0; //} // if ((startOverTime * 1000) > (millis() - SOTimer)) if (vin < (startAllOverAgain + tcomp)) // Voltage level to restart charge cycle when voltage drops below threshold due to night or very heavy load { weAreHereNow = 0; //reset values for start of next charge cycle absorbTime = 0; astart = 0; apause = 0; aelapsed = 0; fstart = 0; fullTime = 0; } } [/code] There are only 10 types of people in the world: those who understand binary, and those who don't. |
||||
| mason Regular Member Joined: 07/11/2015 Location: CanadaPosts: 86 |
great thanks, Do we put that in the run repeatedly or run once area when programming? |
||||
Madness Guru Joined: 08/10/2011 Location: AustraliaPosts: 2498 |
I am not sure what you are asking. Download the files, unzip and put the Arduino folder in your documents folder. Follow this short video but select Nano instead of Uno when you get to that step. Then go to file open in the Arduino software and select REG_17-05-2018_PIDwwatchD_loaded100618.ino . Then you need to compile and upload the code to your Arduino as per the video. Mason if you give me details of what your battery is I can setup the Arduino for you so all you need to do is plug it in. There are only 10 types of people in the world: those who understand binary, and those who don't. |
||||
| mason Regular Member Joined: 07/11/2015 Location: CanadaPosts: 86 |
Hi Gary, I think I was using the wrong settings in the software, My batteries are 48v 750 amp/hour lead acid.. Neil |
||||
Madness Guru Joined: 08/10/2011 Location: AustraliaPosts: 2498 |
Hi Neil, The numbers are all set for Flooded Lead Acid, my battery is a 48V 775AH FLA forklift battery. So you will be able to run the code as is except you may need to change the address for your LCD display. But you do need all the libraries installed, downloading and installing the file above should take care of that for you. These are the only parts you should need to do anything with. // Start the LCD display library LiquidCrystal_I2C lcd(0x27, 2, 1, 0, 4, 5, 6, 7, 3, POSITIVE); // Set the LCD I2C address 0x3F or 0x27 //===========================MAIN CHARGER SETTINGS, REFER TO YOUR BATTERY MANUAL================================================================== float batv = 48; // nominal battery voltage 24 OR 48, could work with 12V with 18v power supply for FET driver chips on pcb double floatVolts = 54.0; // User setting for the FLOAT voltag double absorbCharge = 59.2; // User setting for the ABSORPTION voltage long timedOut = 200; // ABSORPTION MINUTES int startAllOverAgain = 51.5; // User setting for resetting the charge cycle, usually overnight or after heavy drawdown int startOverTime = 5; //?? Minutes below Start over voltage to take effect int Ventfanvolts = 51.0; // Turn on battery vent fan There are only 10 types of people in the world: those who understand binary, and those who don't. |
||||
| mason Regular Member Joined: 07/11/2015 Location: CanadaPosts: 86 |
yeah I figured your program was good for my battery setup thanks a lot, now I just gotta get all the parts ordered and install them on your PCBs when I get them.. Neil |
||||
Madness Guru Joined: 08/10/2011 Location: AustraliaPosts: 2498 |
New PCBs have arrived, still waiting for new screw terminals, the ones in the photos have been taken from AeroSharp PCBs. This is the 4KW Power Board, the screw terminals are for the ground connection. There is 2oz copper top and bottom of the PCB from the terminals to the MOSFET source legs. 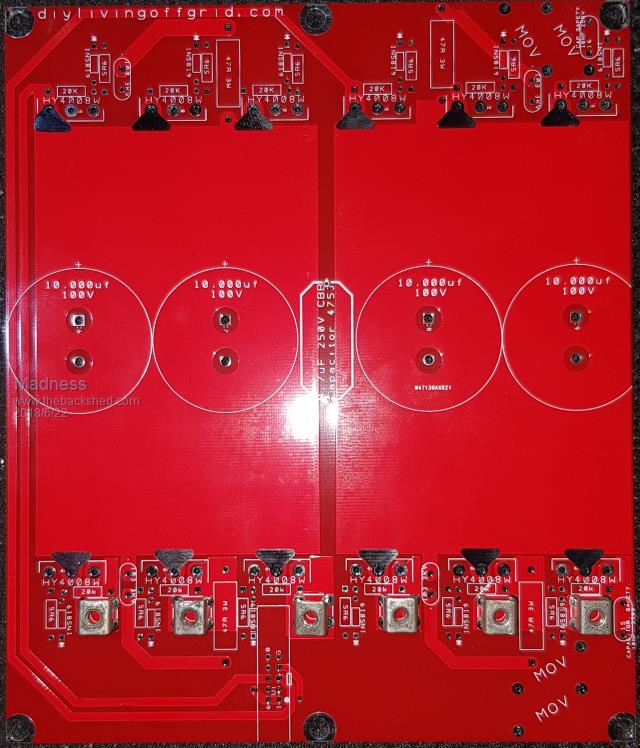 Bottom side still places there to solder negative to PCB if you wanted to. 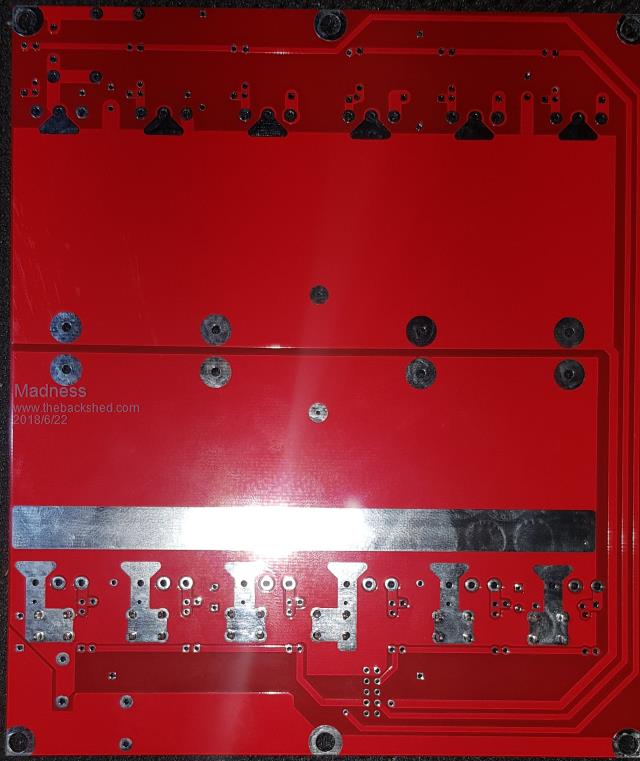 New Regulator PCBs 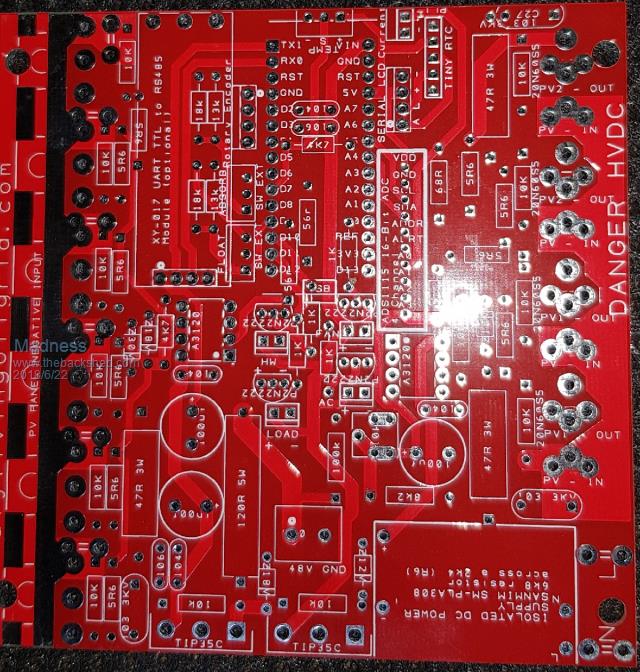 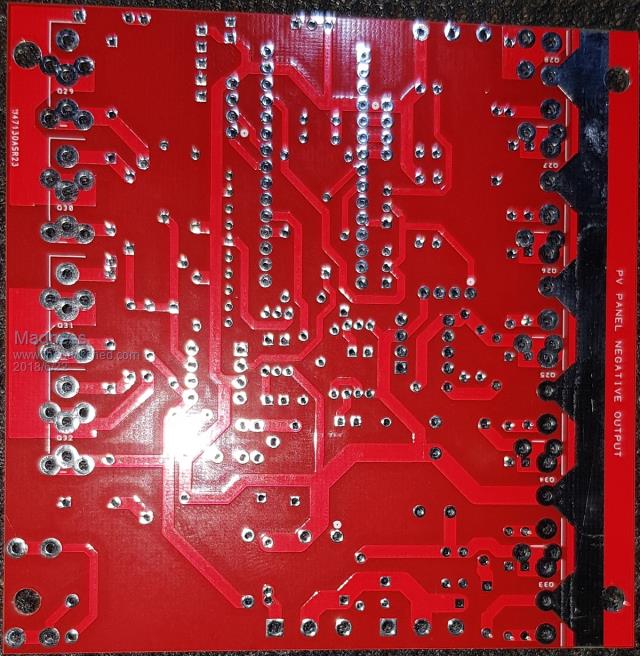 Here is one I have assembled ready to test. 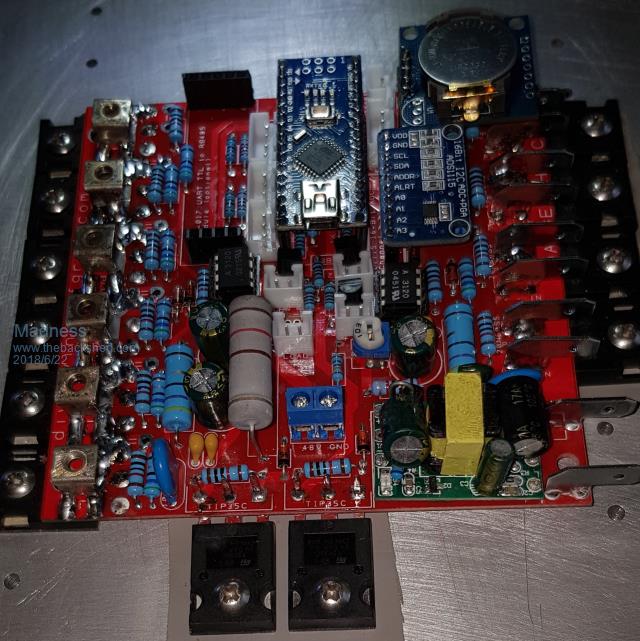 The spade connector sit just to the side of the drain and source legs, straight Spade terminals will work also. 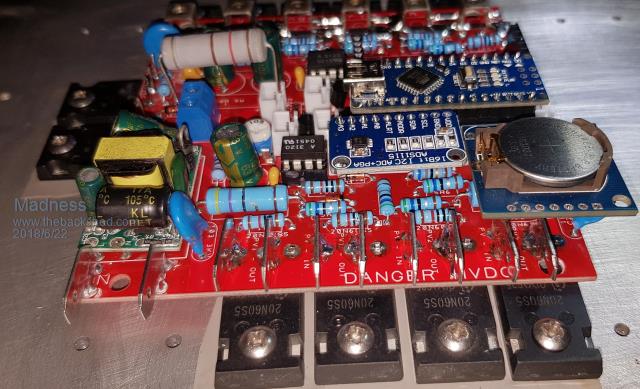 There are only 10 types of people in the world: those who understand binary, and those who don't. |
||||
Madness Guru Joined: 08/10/2011 Location: AustraliaPosts: 2498 |
I have one of the new Charge Regulator boards assembled and been running all day today. 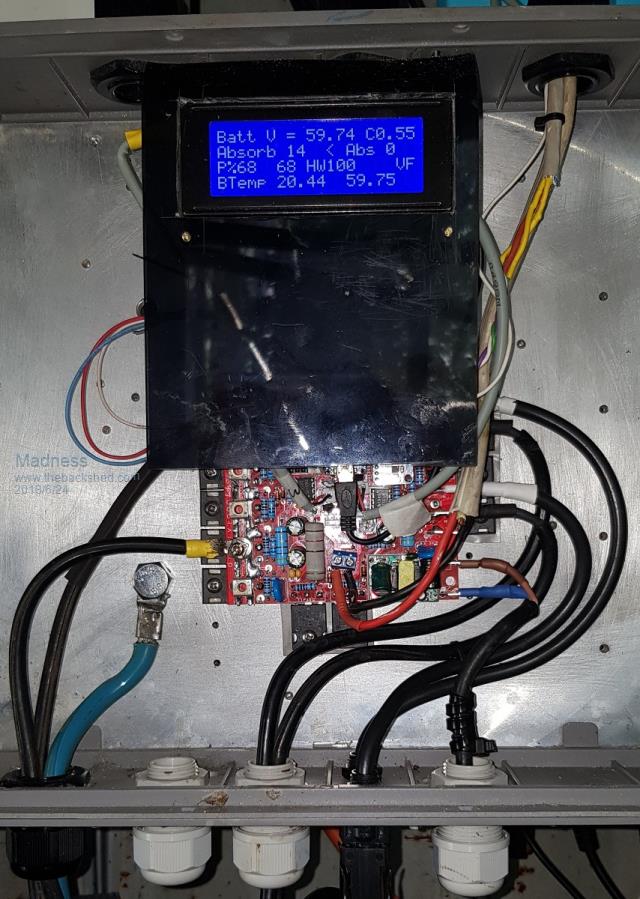 Close up of the display, top line is battery volts and compensation value on the right for battery temperature. Line 2 is charge stage here showing absorb and minutes in absorb, on the right is time it has spent below absorb voltage since absorb started. Line 3 DC - DC and Grid Tie PWM percentage, Hot Water SSR percentage and VF indicate battery vent fan is on. Line 4 Battery temp, and target voltage. I have ordered another current sensor and waiting for it to arrive after the first one was killed by a spike from the step-down converter I was using. 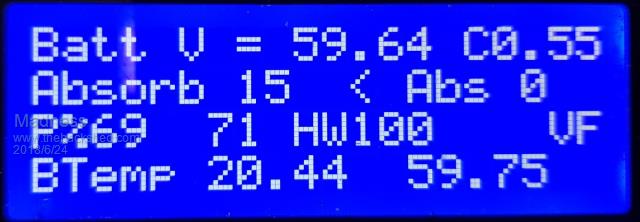 Here is a 4 KW Inverter PCB Assembled, just washed it ready to fit it to the heat sink. The clips of the 10 pin connector is in the way to get to the MOSFET screw however the clips are easily removed and popped back in later. 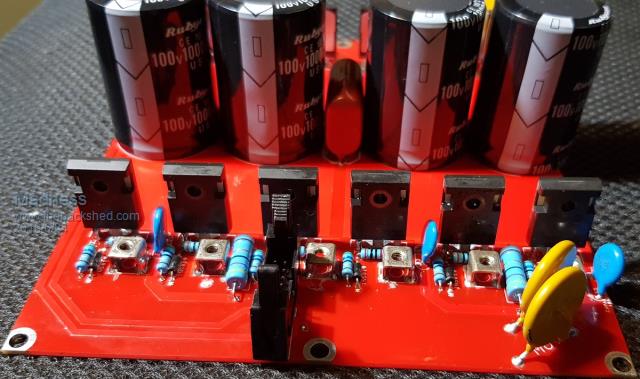 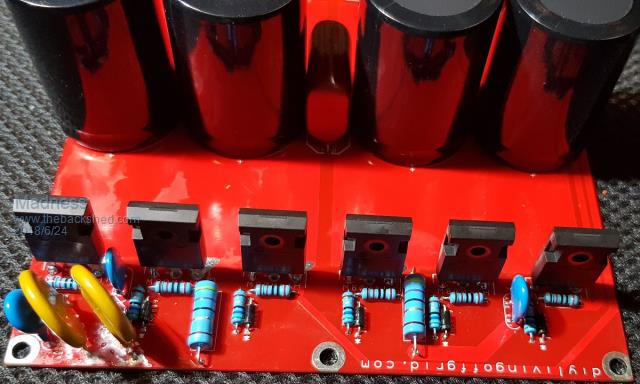 Just waiting on terminals to arrive, should be here in the next few days, I will start sending PCB's tomorrow to those of you who just ordered bare boards. There are only 10 types of people in the world: those who understand binary, and those who don't. |
||||
renewableMark Guru Joined: 09/12/2017 Location: AustraliaPosts: 1678 |
Hey Mad when did you order that sensor, I have one here I can overnight if you are really wanting one in a hurry, it's from the link you supplied. Cheers Caveman Mark Off grid eastern Melb |
||||
Madness Guru Joined: 08/10/2011 Location: AustraliaPosts: 2498 |
Tracking says it left China on a plane today, probably don't have time to play with it this week anyway. Thanks for the offer Mark but I will wait for mine to arrive. There are only 10 types of people in the world: those who understand binary, and those who don't. |
||||
| gaspo Regular Member Joined: 25/06/2018 Location: AustraliaPosts: 65 |
Hi Madness, I haven't seen it mentioned before, what value are the MOVs on that 4kW board? If I read the board layout correctly, are the MOVs connected from the -48V and +48V rails to the earthed case via the mounting holes? |
||||
Madness Guru Joined: 08/10/2011 Location: AustraliaPosts: 2498 |
The MOV's (Metal Oxide Varistors) are there for lightning protection, I have not seen anyone else including them. They are connected between + & - 48V to earth on the case as you correctly mentioned. Any voltage above 65 is okay but any I have seen are rated over 200V at which they will conduct. There are only 10 types of people in the world: those who understand binary, and those who don't. |
||||
renewableMark Guru Joined: 09/12/2017 Location: AustraliaPosts: 1678 |
Yee of little faith, tut tut. 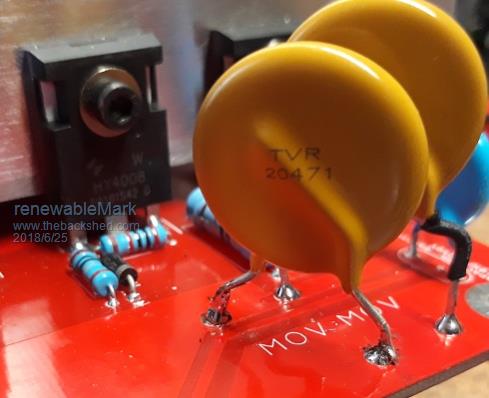 Actually I only just put them on, I wasn't too concerned as it's not mounted in a box yet, and we get bugger all lightning in Melb anyway. Those are the recovered aerosharp ones, if you look here on p30 it has the data for them. The ones I used were NIB inverters so ok but best to get new ones rather than pulling them from used equip. Cheers Caveman Mark Off grid eastern Melb |
||||
Madness Guru Joined: 08/10/2011 Location: AustraliaPosts: 2498 |
Mark do you know what will happen now you claim to not get lightning? We get it regularly here, a couple years ago it was very warm overcast afternoon and bolt came out of nowhere and struck very close by. I heard arcing behind my computer for a second or 2 after the strike yet the computer was still working. Soon (after a change of underwear) I discovered the internet had stopped working, turned out my modem was dead and it was the source of the arcing I heard. The strike was about 70M away and hit the ground and fried the underground phone lines. I spoke with the tech who was fixing it and he said all the phone lines were melted together and they had to replace the whole lot which took a few days. There are only 10 types of people in the world: those who understand binary, and those who don't. |
||||
renewableMark Guru Joined: 09/12/2017 Location: AustraliaPosts: 1678 |
Actually come to think of it a pretty young girl was killed not far from me by lightning not that long ago. here No one told them to stay away from trees and cars in a storm I guess. If only we could harness and store all that energy. Cheers Caveman Mark Off grid eastern Melb |
||||
renewableMark Guru Joined: 09/12/2017 Location: AustraliaPosts: 1678 |
Hey Mad, when you get a spare moment, no hurry, could you do an actual list of the parts req'd, I could fumble my way through the screenprint, but might stuff something up.(now that's not likely is it   ) )Cheers mate Cheers Caveman Mark Off grid eastern Melb |
||||