
|

|
Forum Index : Windmills : A small HAWT
| Page 1 of 4 |
|||||
| Author | Message | ||||
| Air Bender Senior Member Joined: 25/01/2011 Location: AustraliaPosts: 206 |
Hi all I have started puting together a small hawt. I would love to build one a decent size but unfortunatly I dont have the room to put it up, so a mini one will have to do. What I have put together so far is only experimental and none of it may end up being part of the final mill I put up on a pole. at this stage it has all been built out bits that I had lying around in the shed, so if it dosnt work it hasnt cost me anything. 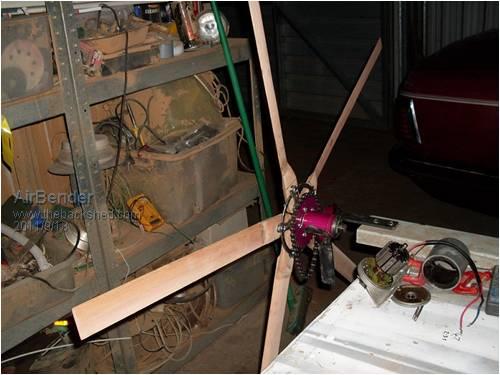
The diameter is 1.2m and the gearing is 2.5 to 1. I have a small 24 V DC scooter motor that I am going to try. The objective is to put out 12 V. I have run this motor on a drill and have had it puting out 16 V but I will have to see if the mill even with the gearing can spin it fast enough. If not I will try an auto fan motor or go with some diferent blades, carving wooden blades for a mill this size is not too big a job if I dont get it right straight of. I had the motor clamped on and the chain conected and it refused to turn. so I pulled the motor apart and found that one of the magnets had come a drift so I have just finnished gluing it back in. Lucky it wasnt spining fast when it happened. I am going to set this up on a test stand out side where I can put it up and take it down easy. Its not worth spending the time to set this up properly untill I know that it is going to work. Any ideas or comments welcome. All the best Dean. |
||||
| Air Bender Senior Member Joined: 25/01/2011 Location: AustraliaPosts: 206 |
A couple more pictures 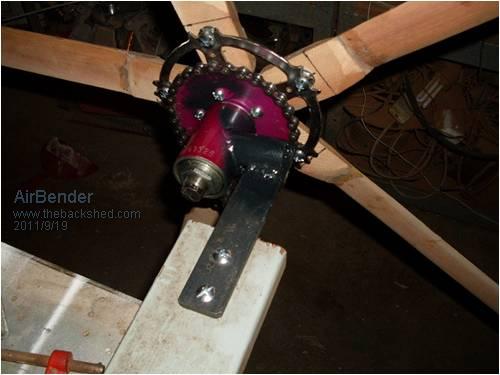
I have converted a bike crank for it to spin on. 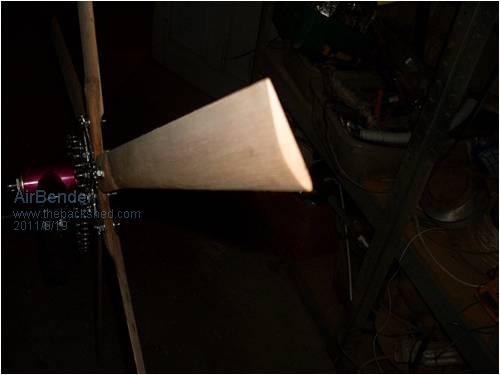
This will give you an idea of the blade profile and angle. The blades are still a bit rough they could still do with a bit more sanding and shaping. All the best Dean. |
||||
| Air Bender Senior Member Joined: 25/01/2011 Location: AustraliaPosts: 206 |
HI all I had the HAWT up for a test run today had 30 km/h winds from the north. it sounds like good winds but unfortunatly the wind needs to get through this to get to the mill. 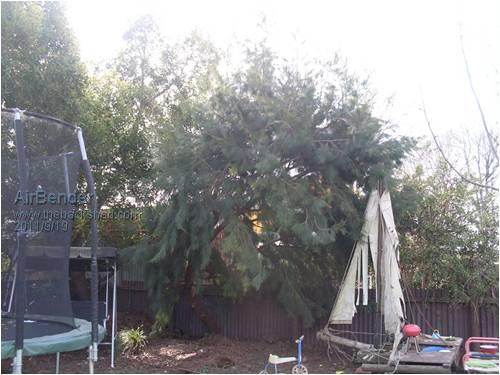
But still it performed well when the gusts did get through, with it spinning up quickly and puting out 9V at times. 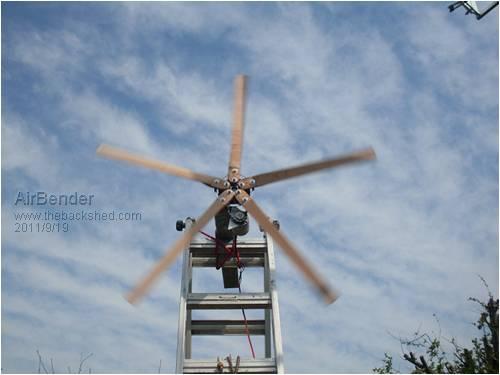
I think with a bit more work and in better conditions this mill could reach 12 plus volts. Just getting the mill up higher and have it piviting so it can hunt the wind direction will be an improvment, testing will continue The sky got dark and it looked like rain so I packed the mill back in the shed and I sat down and started typing this and I heard a huge roar outside and there were bits of branches blowing of trees and flying through the air and the VAWT was going like the clappers and holding together but unfortunatly the trees to the north didnt blow down. |
||||
| BobMann Senior Member Joined: 30/06/2011 Location: United StatesPosts: 134 |
Hello very good it is a good start. Bob Mann |
||||
| Air Bender Senior Member Joined: 25/01/2011 Location: AustraliaPosts: 206 |
Hi all This morning I did some reshaping on the blades. I thinned out the tips a bit and while shaped a bit more twist into the blades giving the tips less angle. This afternoon it put it back up for another test with quite a bit less wind but with it coming from a cleaner direction. 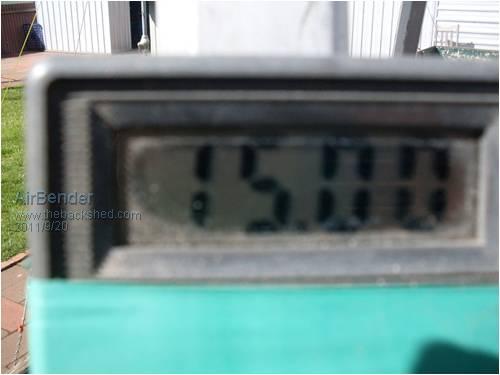
Mill was puting out 15 volts and at times I saw it get as high as 16. 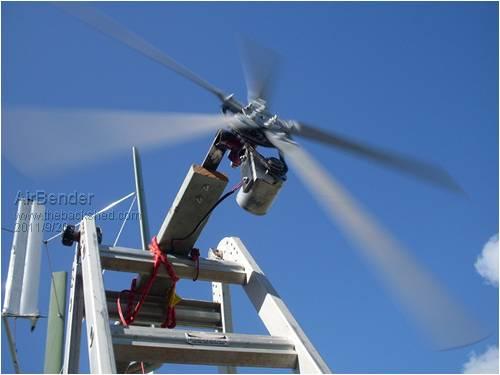
Know I need to think about how to set it up as a perminant fixture. This will take more time work than what it has taken so far but I know now that it can contribute. All the best Dean. |
||||
| Gizmo Admin Group Joined: 05/06/2004 Location: AustraliaPosts: 5078 |
Thats good to see Dean. 15 volts means it can charge a 12v battery, so its a working machine. Now you can experiment with it and find ways to increase its power. Make sure the chain is aligned and not to tight, and with a bit of oil occasionally it should last a long time. Glenn The best time to plant a tree was twenty years ago, the second best time is right now. JAQ |
||||
| Air Bender Senior Member Joined: 25/01/2011 Location: AustraliaPosts: 206 |
Hi Glen I have been wanting to build a hawt for a long time, I will need to set it up on a pole which will enable me to get it up and down easy so I can keep it lubed, this shouldnt be to hard as it is only small and light. Now that it is working I can take my time and tidy it up, make a pivot joint, slip rings and a furling tail I am looking forward to setting this up. It should look good up next to the VAWT. All the best Dean. |
||||
| Air Bender Senior Member Joined: 25/01/2011 Location: AustraliaPosts: 206 |
Hi all Mill is slowly coming together. 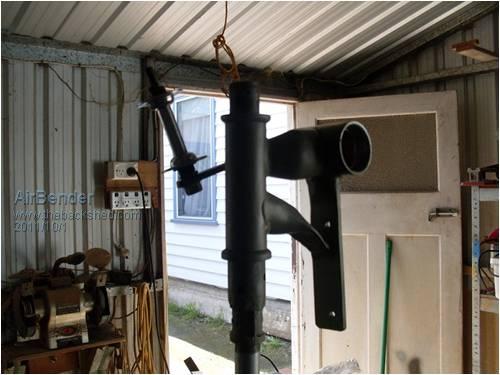
Most of it has been built out of an old bike that was heading toward the tip. All the best Dean. |
||||
| Gizmo Admin Group Joined: 05/06/2004 Location: AustraliaPosts: 5078 |
Nice work Dean Glenn The best time to plant a tree was twenty years ago, the second best time is right now. JAQ |
||||
| Air Bender Senior Member Joined: 25/01/2011 Location: AustraliaPosts: 206 |
Hi all Working on the tail today. 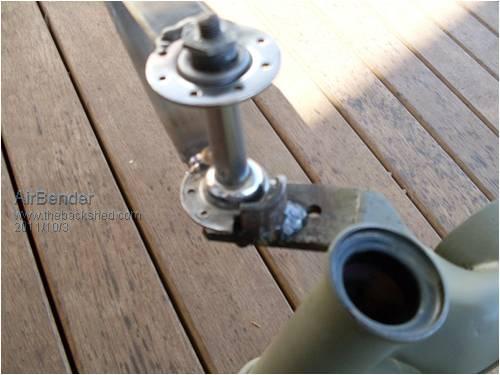
Pivot and stop set up. 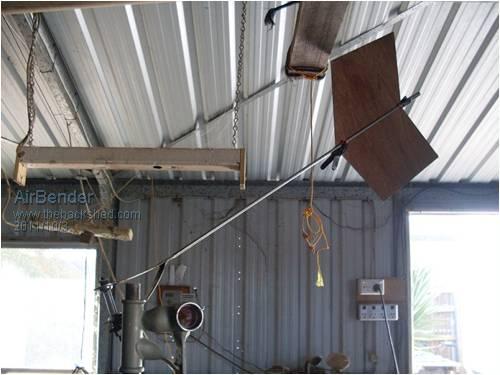
Tail in fully furled position. All the best Dean. |
||||
MacGyver Guru Joined: 12/05/2009 Location: United StatesPosts: 1329 |
AirBender I like the way you've used a front bicycle hub in your build. I've also adapted using them as my main shafts. They're cheap and well designed, long lasting and available all over the place. One of the hardest aspects of being your own machinist is manufacturing a robust shaft with BOTH bearings aligned. A bicycle hub does all this and more and nearly cuts many projects' building time in half. The fact that I build mostly what can only be called "toys" lets me get away with these as a main shaft. I've been working on an "off-the-shelf" axial flux turbine of late and as soon as it's a little more completed, I'll post a build and some pictures. This is a project aimed at newbies to enable them to actually build a working model without having to have a full machine shop at their disposal. This is a true ax-fx and can be built with a screwdriver and a forstner bit (more or less). Good work; keep it up. . . . . . Mac Nothing difficult is ever easy! Perhaps better stated in the words of Morgan Freeman, "Where there is no struggle, there is no progress!" Copeville, Texas |
||||
| Air Bender Senior Member Joined: 25/01/2011 Location: AustraliaPosts: 206 |
Hi Mac On a windmill this size using old bike parts makes the job cheap, easy and light which makes it easyer to lift it up and down on a pole. I am planing to get this up as high as the VAWT, may be even a bit higher. At the moment I am looking for a cap to fit on top of the wheel hub to keep the bearings dry. So far this build hasnt cost me a cent everything I have found lying around in the shed. But I will fork out for a new set of cups cones and bearings for the main shaft and also I will need a pole and some wire. But all in all I think it will be a very cheap wind mill. All the best Dean |
||||
MacGyver Guru Joined: 12/05/2009 Location: United StatesPosts: 1329 |
Air Bender If you can't come up with suitable caps, try using a long-fiber grease. A long-fiber lubricant will stand up to heat and moisture better than thinner stuff and since the only real movement is a side-to-side wag in the steering mechanism (tail) it should be just fine for a long time. . . . . . Mac Nothing difficult is ever easy! Perhaps better stated in the words of Morgan Freeman, "Where there is no struggle, there is no progress!" Copeville, Texas |
||||
| Air Bender Senior Member Joined: 25/01/2011 Location: AustraliaPosts: 206 |
Hi all I have assembled it and it all went together well. I have added a bit of light support into the tail boom. It is starting to look like a proper wind mill. 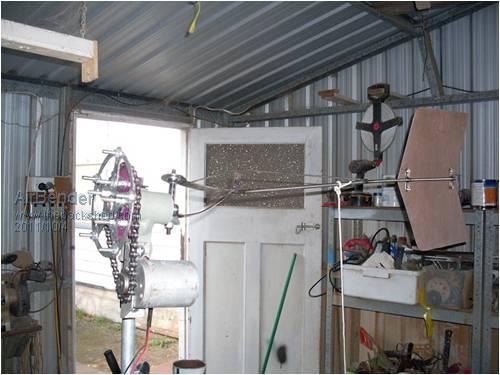
All I need to do is a bit af painting and I want to have a go at making some slip rings. It is not unusual for the wind direction to do a full rotation in a day at our place, and it always rotates around anti clockwise so I would be always untwisting cable, if slip rings cause trouble I will try Bobs bungy. All the best Dean. |
||||
| Air Bender Senior Member Joined: 25/01/2011 Location: AustraliaPosts: 206 |
Hi all I made a start on the slip rings today. I am using an old bike head stem shaft for the base. 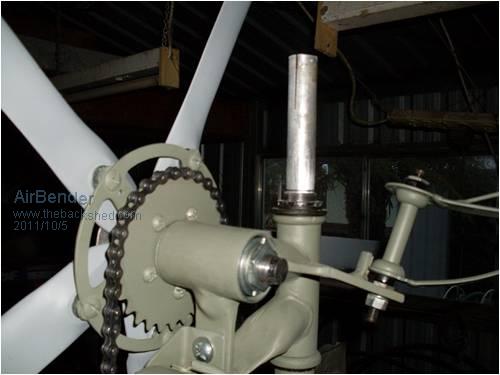
the head stem tube is a nice neat fit, I will probably use a small self tapper to stop this from turning. 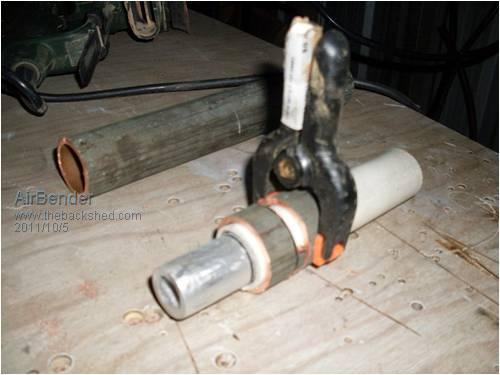
I found some copper pipe with 3mm thick walls. I found that a peice of pvc pipe is a neat sleeve between the two. I plan to use a couple of these plastic clamps as brush calapers but I will need to releive the spring tension a bit. I plan to cut short slots or drill holes along the pvc pipe to allow epoxy to flow through from the stem shaft to the copper rings when I glue it together and I will grind grooves down the stem shaft to give the glue something to hold onto. All the best Dean. |
||||
| Air Bender Senior Member Joined: 25/01/2011 Location: AustraliaPosts: 206 |
Hi All I cut the rings out with a small lug on the sides which I soldered the wires onto and then glued it all together with plenty of epoxy, and I am happy with the way it came out. I am undecided on the brush set up I have a couple of ideas but I am back at work tomorow so I will have a bit of time to think about it untill I have time to set it up when I get days of next. 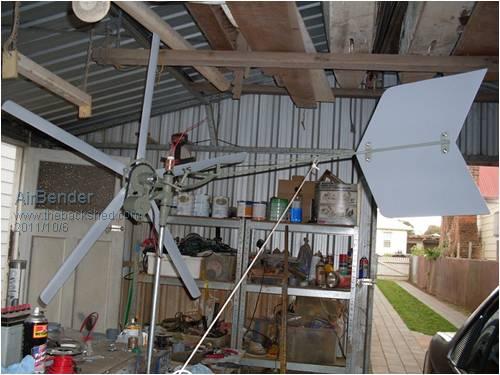
The build nearly finished. All the best Dean |
||||
| brucedownunder2 Guru Joined: 14/09/2005 Location: AustraliaPosts: 1548 |
Hi Dean , nice looking project .. Sliprings--- Don't make the same mistake I might have made .. I used ordinary type carbon brushes ,possibly out of anything,can't remember now. These are fairly resistive and I used twin sets .. They tell me starter motor brushes are saturated with copper ,,so they would be much better ,, try and use them .. All the best Bruce Bushboy |
||||
| Air Bender Senior Member Joined: 25/01/2011 Location: AustraliaPosts: 206 |
Thanks Bruce I seem to read a fair bit about carbon brushes giving problems. After filing and sanding all the epoxy of the rings and polished them up a bit, I am starting to think they are not copper but brass, what I cut them out of may not be copper pipe but brass bushing tube, I will have to wait and see if it loses its shine like copper does. After reading the information on the front page on slip rings I am thinking about using brass bolts as brushes with the bolt heads slightly curved inwards to fit the shape of the rings. If my rings do turn out to be brass I dont know how brass on brass will go or I could make some solid copper brushes. Maybe someone who knows a bit about metels can help me out here. All the Best Dean. |
||||
| paceman Guru Joined: 07/10/2011 Location: AustraliaPosts: 1329 |
Hi Dean, This is my first post but maybe I can help here (I'm a metallurgist - or was till recently). Brass on brass for a bearing or similar, i.e. brushes in this case, is not a good idea. Similar metals rubbing together have a greater tendency to weld together. The rule of thumb is have one soft metal and one hard one, e.g. steel shaft with tin bearings. Obviously the softer metal is the one that's going to wear, so its best to make the more easy to replace one, e.g. the brushes, the soft one. The problem here though is that lubrication is pretty much always needed for metal-on-metal. You probably know this but brasses (copper/zinc alloys) are a lot more yellow than copper. Bronzes (copper/tin alloys) are good bearing materials and may work for you; maybe that's what you've already got but they're a bit difficult to tell apart by just looking - a spectrometer would be handy! Bronze is harder and tougher than brass (it made good cannons!). When you machine them most brasses machine very easily with nice fine chips. Copper is very ductile and produces a continuous swarf, bronze is in-between but reasonably hard. Resistance-wise, copper naturally is good, but brass and bronze considerably less so. If you stayed with graphite (carbon) it'd be safer but I can't comment on longevity, Greg |
||||
| Tinker Guru Joined: 07/11/2007 Location: AustraliaPosts: 1904 |
Dean, how about removing the brushes & slip rings from a junked automotive alternator? Klaus |
||||
| Page 1 of 4 |
|||||