
|

|
Forum Index : Windmills : MY TURBINE FROM GROUND UP>
| Page 1 of 3 |
|||||
| Author | Message | ||||
AMACK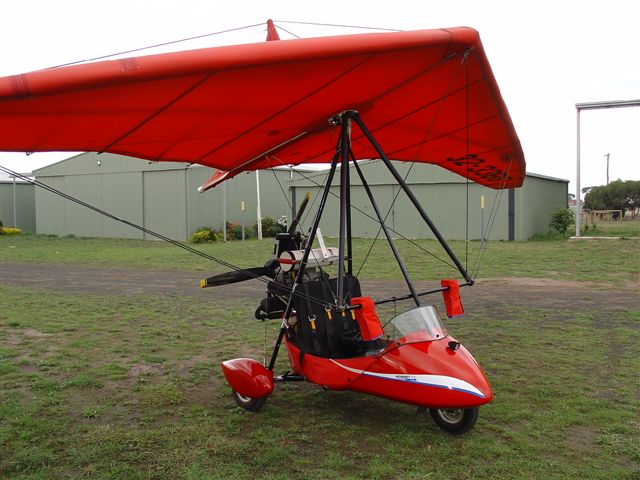 Senior Member Joined: 31/05/2009 Location: AustraliaPosts: 184 |
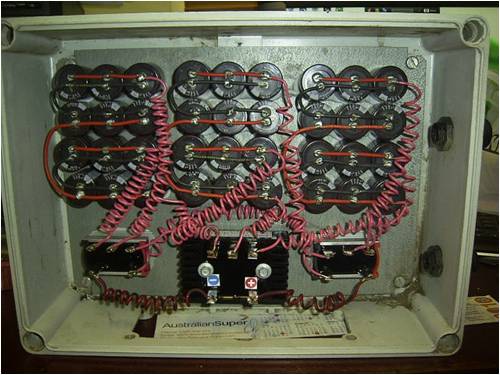
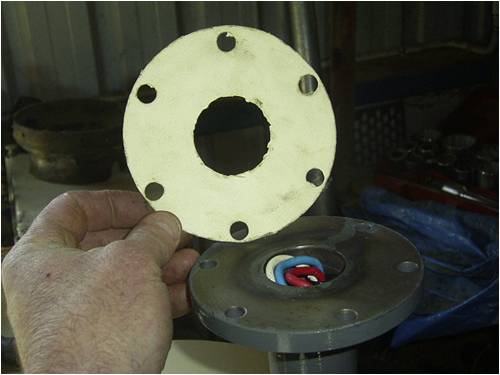
Hi All, I am going to start this post off now but and will be adding to it for some time. I have a new wind generator that I got off Phill that has had mixed feelings among some members about if it should be on the forum or not. First let me tell you about my self and what I do and have done. I live on a farm in Victoria in a small area called Kelvin View. The areaís nic name is windy view as there is almost wind blowing most of the time. I have lived here all of my 35 year and have a wife (Nicole) and twin boys almost 4 and a girl 10 weeks old. I work full time as a Viticulturist ( grow wine grapes ) and love to fly my Ultra-light aircraft when I can and tinker with a lot of other projects. As most people with kids and full time jobs will know finding time to do things gets harder and harder. I have built F&P wind gens and most have failed due to mistakes I have made but I still keep trying. The last turbine I made was a duel motor F&P and I need some blades. I have used PVC in the past and this time I seen the Aluminium ones Phill was selling so I thought I would give them a try. I have tried to make blades out of wood and PVC pipe and have not had much success with them. It is easy to make One blade but to try and get three the same takes a lot of time of which I donít have. Donít get me wrong you can make blades your self as some members have done and they have turned out very well. With my first turbine I even made the slip rings and brush holder out of brass, steel and nylon. It worked well and I still have it. It is currently on the ground at the moment but will rise again. When I sent Phill a message about blades he sent me a quote and postage cost but also sent me a photo of this mill he had been playing with. I looked at it and then look at the amount of money I was going to spend on blades and bits for the one I was working with. I then decided to get one and try it out on a tower I have. The tower I have is 45 ft with a 40 ft extension pole.( Total high around 85 ft) I did not want to put a F&P on it as I had not worked out all the bugs, and did not want to try and climb up an down a tower to fix them. I think trying to fix things 45 foot up is looking for trouble. I will be sending data from the mill to the site by one of Downwind (Peteís ) loggers so any one can look at the data. I am still in the process of getting the turbine up and will post more photos of the progress as it happens so I can get feed back and ideas from other members. Here are some photos to start but there will be a lot more to come.. The Voltage doubler I have wired up from help from Phill and the date logger I got help from Pete. P.S (Downwind) Pete the pink wiring is to match the keyboard 
AMACK 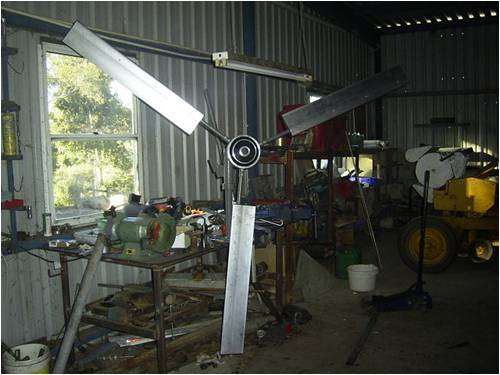
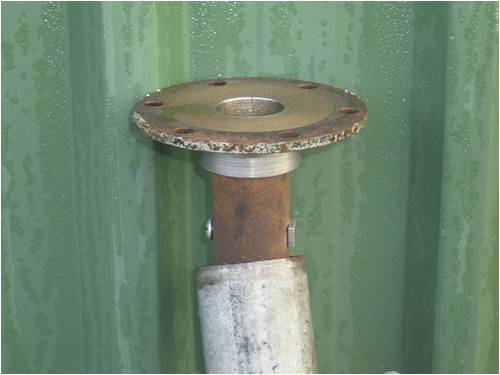
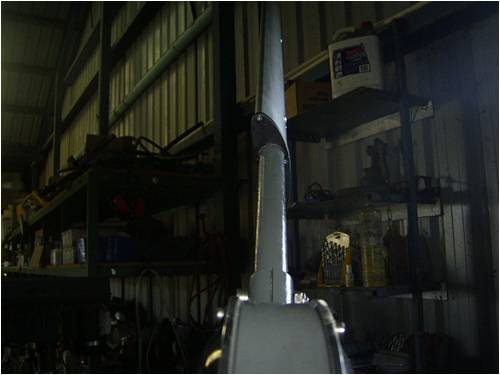
*Note to self 1. Make it thick 2.Make it heavy. 3.Make it stronger than it should be. 4. Don't rush the first job as the second job will cost more and take mor |
||||
Downwind Guru Joined: 09/09/2009 Location: AustraliaPosts: 2333 |
Amack, Its good to see you have a real Boyz Toy to play with now, and you can leave the girls pink toys alone for a while 
We should advise other members best not to agree with the wife when she wants to buy a pink computer as you might need to use it 
Pete. Sometimes it just works |
||||
Bryan1 Guru Joined: 22/02/2006 Location: AustraliaPosts: 1344 |
Hiya AMACK, I might aswell say here as it hasn't been said before, I did after Dennis's experiments using parallel caps was put put 2 each 400 volt 440uf caps back to back on each phase and saw the current rise in my F&P at the time to heaps higher levels. Gordon came up for a visit saw what happened and well since then it is now his idea. I'm over the plastic F&P now as the weather here played havoc with them, after doing a 2hp motor conversion I'm now onto building a dual axial flux after a good discussion with the 'appointed Judge' Prof. Oztules. What was quoted bang for buck a F&P or motor conversion, a dual axial flux wind genny will beat the pants off any other DIY design and I do agree. I arranged a contact in china to get top class neo's for my motor conversion which most have been sold for 3x I bought at. I have since got some 50x15 N52 round neo's which 2 other forum members got. If you want to go this way let me know as I am in the process of getting a truck load of wood for blade carving and proposing doing a workshop for the locals here. I can get neo's out of china pretty cheap so the opening is there if people want to build a dual axial flux generator. Cheers Bryan |
||||
AMACK Senior Member Joined: 31/05/2009 Location: AustraliaPosts: 184 |
Here is the tower that the turbine is going on. It's about 45 ft from base to top of frame. Youu may be able to see the pipe that runs up the middle, this can be raised another 40 ft. I have also posted a photo of my battery shed and the gear I have got running so far. Tomorrow I will have re-connected the logger with a few extras. 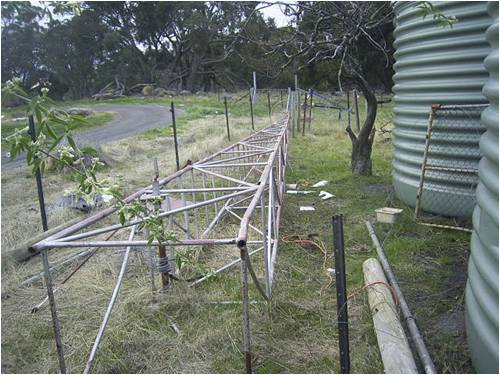
The next photo's are of the Battery shed it houses the Invertor,logger,Voltage doubler oww and the batterys, all two sets of them. I have one set of the Trojon 105's (love them) and four Excide 875 amp/hr. I also have a PL40 to control the solar pannels on the roof. The invertor is a Latronics 1800watt 24 volt 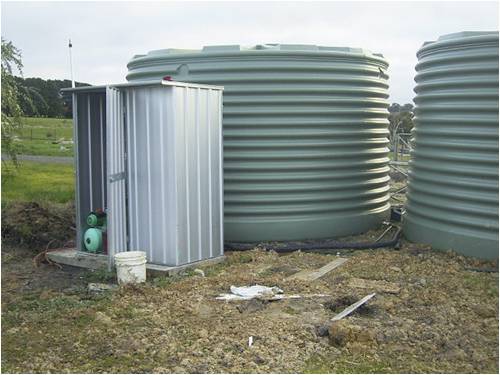
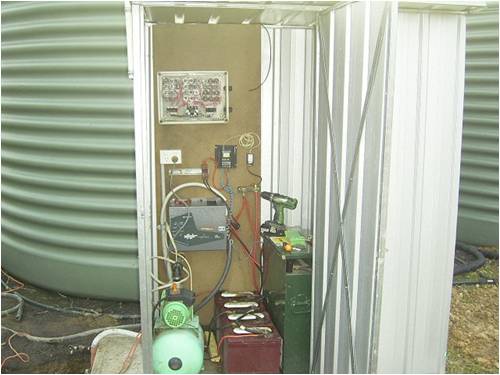
You can see the aeiral from the data logger from PETE (DOWNWIND) had posted that I copied. In the top phot of the battery shed you may not be able to see the four holes dug down 4ft, this is were the tower will be. Over the weekend it will be boxed and the Bolts and pipe will be set ready for concrete.There will also be a 1200x1200x300 slab of cement over the holes. The bots and pips are over kill but I know it will stay up as I am getting sick of gear fall back to earth. They are yet to get rod welded across them so they will not pull out of the cement. 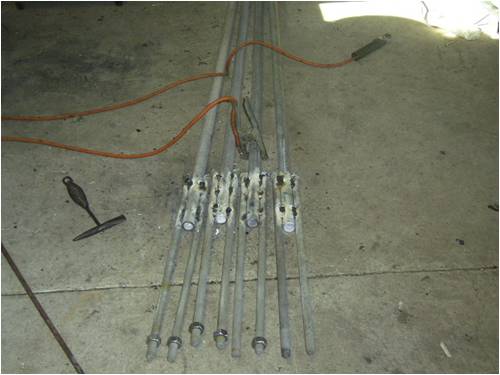
I will be using 13mm 2 copper wire from the turbine to the battery bank so voltage drop should be nill. It will only be 33 mt in total even shorter if Cut it back if I do not need it. Will put more photos and a run down of what the weekend brings and how far the job gets, but should be up and running in a week with luck. AMACK *Note to self 1. Make it thick 2.Make it heavy. 3.Make it stronger than it should be. 4. Don't rush the first job as the second job will cost more and take mor |
||||
fillm Guru Joined: 10/02/2007 Location: AustraliaPosts: 730 |
Hi Amack , Thats a great looking tower set up , hopefully soon you will have it all in the air with the power and data comming in . The lockable battery shed is a good idea , especially having young inquisitive hands running around . Look forward to see what you get done over the weekend in your next post .. PhillM ...Oz Wind Engineering..Wind Turbine Kits 500W - 5000W ~ F&P Dual Kits ~ GOE222Blades- Voltage Control Parts ------- Tower kits |
||||
AMACK Senior Member Joined: 31/05/2009 Location: AustraliaPosts: 184 |
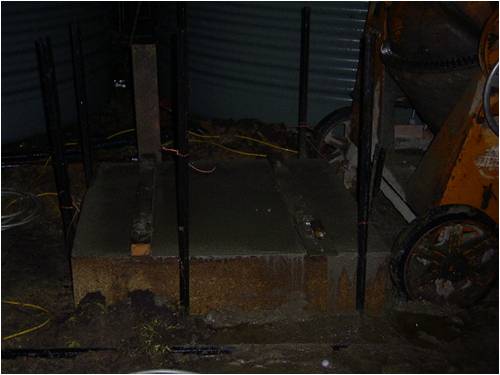
Hi All, The footing for the tower is complete. I dug four holes 1300mm deep about 40 cm round then put a 1200x1200x300mm box on top and filled it with concrete. Sorry for the dull photos as it was getting dark. I am not as fit as I thought as I fell stuffed now and my arms are killing me. The tower will be up over the weekend and the turbine up as I intend bolting it on the tower before I stand it up. 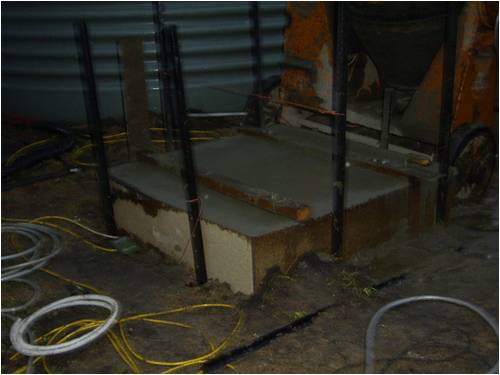
*Note to self 1. Make it thick 2.Make it heavy. 3.Make it stronger than it should be. 4. Don't rush the first job as the second job will cost more and take mor |
||||
| Bub73 Senior Member Joined: 10/12/2009 Location: United StatesPosts: 116 |
AMACK, '  ' '
Do you have any pictures of your hinge apparatus you are going to use in standing up the tower? '  ' ' |
||||
| JimBo911 Senior Member Joined: 26/03/2009 Location: United StatesPosts: 262 |
Amack Nice job Mack keep it coming. That tower should bring some impressive results. Mill placement (height) is so important on annual KWH production. Looking forward to viewing your progress.  Jim |
||||
AMACK Senior Member Joined: 31/05/2009 Location: AustraliaPosts: 184 |
Hi bub73, I will be using a tractor to get it into position then lift it as high as i can with it, then electric winch to do the rest. I am not using a hinge it will be bolted to the pad with 8 bolts that are mounted in the concrete. Blue is 10mm plate and the yellow area is the 1" or 25mm nuts. AMACK *Note to self 1. Make it thick 2.Make it heavy. 3.Make it stronger than it should be. 4. Don't rush the first job as the second job will cost more and take mor |
||||
| isaiah Guru Joined: 25/12/2009 Location: United StatesPosts: 303 |
That should be interesting without a hinge or pivot of some sort.Do I understand right that you have 40 feet of tower and forty feet of pipe sticking out the top for a total of 80 feet!! Might want to have someone do a video while that operation is taking place URL=http://www.motherearthnews.com/Renewable-Energy/1973-11- 01/The-Plowboy-Interview.aspx>The Plowboy Interview[/URL> |
||||
AMACK Senior Member Joined: 31/05/2009 Location: AustraliaPosts: 184 |
Isaiah, The tower from Base to ring top is 47 feet and there is a pole that is winched up to around another 40 feet. The total tower hight at full extention is 87 feet. I have moved the tower into place today and is set to be lifted up. This will happen with luck and weather permiting this weekend or Friday. The best thing about living on a farm is that you have machines that can do the work for you. I will get photos of it going up and set in place. The weather has slowed things down a bit more than I would have liked, it has been cold and very wet. For the past 5 years we have been in a drought and when I dig a hole to put concrete in it is rains for a week. 
AMACK *Note to self 1. Make it thick 2.Make it heavy. 3.Make it stronger than it should be. 4. Don't rush the first job as the second job will cost more and take mor |
||||
| isaiah Guru Joined: 25/12/2009 Location: United StatesPosts: 303 |
AMACK Be careful even the 40 feet will have a pull against you when it gets to a hi angle. Do you really need the 40 of pipe extra? 87 feet is a long way up there. We will be waiting to see the pic's I know about the farm equipment we have some here. I do have a electric winch that need a control switch of some sort for the forward and reverse.'  ' 'URL=http://www.motherearthnews.com/Renewable-Energy/1973-11- 01/The-Plowboy-Interview.aspx>The Plowboy Interview[/URL> |
||||
AMACK Senior Member Joined: 31/05/2009 Location: AustraliaPosts: 184 |
Isaiah, I will not be going the full hight of 87 feet. I am only going up to aroung 52-55 feet. The pipe came with the tower, it was used for two way radio's by an earthmoving company. I have attached a small drawing from Paint that gives you an look at what I intend to do. ( It looks like a kids drawing but that as good as paint gets) I have also got guide wires to the top that will be conected to 4 concrete block about 4 feet in the ground. I am using 1/4 wire rope and turnbuckels to conected to the tower. These will be in place before it goes up. I will pick a nice carm day to do it too. I was concerned about it going over towards the winch side but if I has the cables in place it should stop? I will also chain it to the tractor folks just incase. It would have been nice to use a crain but the cost would kill it. AMACK *Note to self 1. Make it thick 2.Make it heavy. 3.Make it stronger than it should be. 4. Don't rush the first job as the second job will cost more and take mor |
||||
| isaiah Guru Joined: 25/12/2009 Location: United StatesPosts: 303 |
Ok You are going to adjust the guy cables as it goes up? This would help especially if something went wrong. We had antenna towers when I was in the army they would go 60 feet with a pivot plate, gin pole and guy wires you had to start it up with a bow to it the take the bow out as you went up. be careful and stay safe Keep us posted we will be waiting to hear your successful out come URL=http://www.motherearthnews.com/Renewable-Energy/1973-11- 01/The-Plowboy-Interview.aspx>The Plowboy Interview[/URL> |
||||
AMACK Senior Member Joined: 31/05/2009 Location: AustraliaPosts: 184 |
Hi All Sorry I have not posted any more info for the past week. The weather here has been wet cold and very windy. I would have loved to have Phill turbine up for the past day as it would have really tested it out. ( out put and staying power) We have had about 5" 125mm of rain in the past week. I had planned to stand the tower up today but the wind was up over 60-70 km/h with gusts over 100 km/h, so not a good day to do it. I plan to get the tower and turbine up in the next day or so. If anyone is interested in wire rope ( cable) set up I am going to do a post on Spliceing cables and correct set ups. This will be from a basic to complex spliceing. AMACK *Note to self 1. Make it thick 2.Make it heavy. 3.Make it stronger than it should be. 4. Don't rush the first job as the second job will cost more and take mor |
||||
AMACK Senior Member Joined: 31/05/2009 Location: AustraliaPosts: 184 |
The tower is up   but the turbine is not yet running, I will connect the wires into the batterys in the morning. We had a little working B at home today, a mate Rod and my brother Peter came up and gave me a hand. It went up alot easier then I thought it would. We bolted the turbine on and lifted it up from the side with the tractor till we could get prop under it. We then moved the tractor around and slid it up. I had a cable tied to the ute and a chain around the tower so it could not fall off the tractor folks or slid around. Like the sketch above and it went off well. I have connected all the cables and turn buckels and it's all locked down. but the turbine is not yet running, I will connect the wires into the batterys in the morning. We had a little working B at home today, a mate Rod and my brother Peter came up and gave me a hand. It went up alot easier then I thought it would. We bolted the turbine on and lifted it up from the side with the tractor till we could get prop under it. We then moved the tractor around and slid it up. I had a cable tied to the ute and a chain around the tower so it could not fall off the tractor folks or slid around. Like the sketch above and it went off well. I have connected all the cables and turn buckels and it's all locked down.
I wll be posting some photo's in the morning. I still have a few small things to tidy up on it but it is up.. 
AMACK *Note to self 1. Make it thick 2.Make it heavy. 3.Make it stronger than it should be. 4. Don't rush the first job as the second job will cost more and take mor |
||||
| isaiah Guru Joined: 25/12/2009 Location: United StatesPosts: 303 |
Amack Good to hear its up with no problems hope the rest works out ok. I would be interested in the cable splicing etc. We went for a ride yesterday to a animal swap meet and on the way home I spotted a home made turbine and went back and was able to get a couple pictures but the light was not good. The mill is gear reduced it has a large gear or pully on the main shaft and the motor what ever it is below it. The tail I thought was a bit on the large side but I dont know any thing any ways. It was real cloudy and NO TRESPASSING SIGNS on the property and the MRS wanted me to get going. As it was there was no wind so we couldn't see it run either. Ive seen mills and when I was still working I did some machining on the big mills. but this is the first home made one I have found other than the ones Bub and I have. Maybe ill get Bub to post one pic of it.javascript: '  ' 'URL=http://www.motherearthnews.com/Renewable-Energy/1973-11- 01/The-Plowboy-Interview.aspx>The Plowboy Interview[/URL> |
||||
AMACK Senior Member Joined: 31/05/2009 Location: AustraliaPosts: 184 |
Hi ALL, It's been a long time in the making but here is a photo of the tower. All I can say is it is a long way to the top. The top of the ring is around 48 feet. I have only but the pipe up about 10 feet so it clears the tower. When I was going up it for the first time my leg was doing an Elvis  It might not look far up but when you get up there looking down FEW LONG WAY DOWN. It might not look far up but when you get up there looking down FEW LONG WAY DOWN.
I will put up some details of the cable splicing I used. I spoke to one member that told me not to saddle a dead horse? It means the tail of the cable is not to have the sadldle on it, it goes on the down running end. I will post a few more of how to do a BUSH splice too, it is just a matter of unrapping some of the cable making a loop and laying it back together.. AMACK *Note to self 1. Make it thick 2.Make it heavy. 3.Make it stronger than it should be. 4. Don't rush the first job as the second job will cost more and take mor |
||||
| Robb Senior Member Joined: 01/08/2007 Location: AustraliaPosts: 221 |
Look at that little power pole there in the background  Very impressive! Very impressive!
If it stood up in saturday nights winds that's a good stress test  |
||||
Downwind Guru Joined: 09/09/2009 Location: AustraliaPosts: 2333 |
Yes i think climbing that tower would put the wind up most folks  , heres hoping it works that way for the mill too. , heres hoping it works that way for the mill too. 
Nice work.   
Pete. Ps. neat splice. Sometimes it just works |
||||
| Page 1 of 3 |
|||||