|

|
Forum Index : Windmills : small chinese turbine’s anatomy
| Author | Message | ||||
| yahoo2 Guru Joined: 05/04/2011 Location: AustraliaPosts: 1166 |
Anyone interested in seeing whats inside one of these 12/24 volt turbines ? I replaced the bearings but didn't have the camera with me when I cracked the case open. I still have a mount to manufacture for it, so I could open it up again and take a few photos if some members would like a look. I'm confused, no wait... maybe I'm not... |
||||
| Gizmo Admin Group Joined: 05/06/2004 Location: AustraliaPosts: 5078 |
Hi Yahoo Yeah I would like to see inside, but only if its an easy job for ya. It would be interesting to see what the armature looks like, rounded magnets I'm guessing. And the slip rings. Glenn The best time to plant a tree was twenty years ago, the second best time is right now. JAQ |
||||
| yahoo2 Guru Joined: 05/04/2011 Location: AustraliaPosts: 1166 |
Anatomy part 1 There is six long allen key head bolts that hold the main body and tail section to the generator assembly. Good quality keys are essential because they are loctited in. I used a dead blow hammer to split the case open by very firmly tapping on the cooling fins but a large piece of soft wood would do the same job. In this pic you can plainly see the vertical shaft that bolts to the tower and the slip ring assembly ( I will take some photos of this but I need some more light to get a clear shot close up). The two plates cast into the generator back plate hold the slip ring assembly so it does not move and wear the wires, very neat. I'm confused, no wait... maybe I'm not... |
||||
| yahoo2 Guru Joined: 05/04/2011 Location: AustraliaPosts: 1166 |
anatomy part 2 Next I removed the 3 short allen head bolts holding the rear generator case on, replaced the nut on the tapered shaft so I didnt damage the thread and hit the shaft on the end with the dead blow hammer. It is a tight fit, took 3 good hits to part the case away from the body from there the back case could be wiggled off by hand (lucky). Removed the 3 remaining allen head bolts from the front case plate and tapped it to release the front bearing. Normally I would use a bearing puller, if you look at the first photo in the last post there is a recessed grip ring around the shaft made for a bolt on pulling tool. I'm confused, no wait... maybe I'm not... |
||||
| yahoo2 Guru Joined: 05/04/2011 Location: AustraliaPosts: 1166 |
anatomy part 3 At this point I checked the wiring to see that there is no danger of breaking a phase output wire, it pays to cable tie them if they are not secured well, last thing I want to do is join a wire that has snapped below the level of the stator windings. Next job is to remove the rotor, these don't have a lot of magnetism to fight so it is pretty straight forward. I found two large sockets and fitted one on top of the other on the bench, placed the case on top with the rear bearing fitting in the socket and just pushed down on the case until the rotor popped out the front. and here it is! I'm confused, no wait... maybe I'm not... |
||||
| yahoo2 Guru Joined: 05/04/2011 Location: AustraliaPosts: 1166 |
anatomy part4 Notice in the stator photos that the slots are slightly skewed,. I haven't had a good look at the wiring yet so I cant say how the field winding pairs are joined together, I expect they are in series. The rotor runs very close there is less than 1mm gap between the rotor and stator body. The bearings are a standard 2506, I replaced the originals with a NSK with a full contact wiper seal, I am not fond of the low friction non contact seal as it leaves a gap and lets in condensation as the turbine cools down. These only take a week to run in and loosen up anyway (and cost $7). Well there it is, not to hard, 12 minutes to demolish a chinese turbine. I will take a couple of close shots of the slip rings and rotor when I have a bit more light and time. I gotta go study for flying tomorrow. cheers Yahoo I'm confused, no wait... maybe I'm not... |
||||
| Gizmo Admin Group Joined: 05/06/2004 Location: AustraliaPosts: 5078 |
Thanks Yahoo Interresting. Looks a lot like a 3 phase servo motor inside, with the rounded magnets, no cogging. Glenn The best time to plant a tree was twenty years ago, the second best time is right now. JAQ |
||||
| yahoo2 Guru Joined: 05/04/2011 Location: AustraliaPosts: 1166 |
While I was dismantling the turbine I noticed this poor little fella. I nominate him as the worlds unluckiest gecko. I found him on the bench with his head flattened under the rim of a coffee cup I had left there a few weeks ago. A victim of my poor diet. There is a couple of turbine builders in the US that mention that this is ONLY a conveyer belt motor, but hey, it works pretty well for what it is. It is rated at 300 watts but I have seen it peak at 450 W that seems to be the rev limit of the blades in average winds (not gales and storms). The controller will not let it run over 40 amps and switches in the dump load. I'm confused, no wait... maybe I'm not... |
||||
| anteror Senior Member Joined: 06/10/2009 Location: FinlandPosts: 189 |
If you want to see the anatomy of 2kw Exmork, which is nowadays; http://www.huayaturbine.com/ Here is translation and my story, with pictures; http://translate.google.fi/translate?sl=fi&tl=en&js=n&prev=_ t&hl=fi&ie=UTF-8&layout=2&eotf=1&u=http%3A%2F%2Fwww.poikkis. net%2Findex.php%3Ftopic%3D5033.0&act=url Antero Finland |
||||
| philb Regular Member Joined: 05/07/2008 Location: United StatesPosts: 96 |
Thanks for the post Yahoo2. That's an interesting setup. It looks well built. philb |
||||
| Greenbelt Guru Joined: 11/01/2009 Location: United StatesPosts: 566 |
Yahoo2 Said; Well there it is, not to hard, 12 minutes to demolish a chinese turbine. I will take a couple of close shots of the slip rings and rotor when I have a bit more light and time. I gotta go study for flying tomorrow. end Quote. I gotta go study for flying tomorrow. Here are a Couple Links (Off Topic) that could be of interest to you? safe and pleasurable way to fly. --- Shop Talk is Gone, I'm Going to Miss it. Lean back and enjoy the View! Land Normally when engine fails --------Cheers, Roe Time has proven that I am blind to the Obvious, some of the above may be True? |
||||
| dom2402 Newbie Joined: 22/05/2012 Location: AustraliaPosts: 3 |
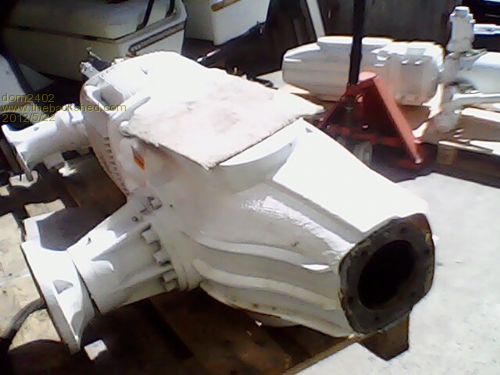
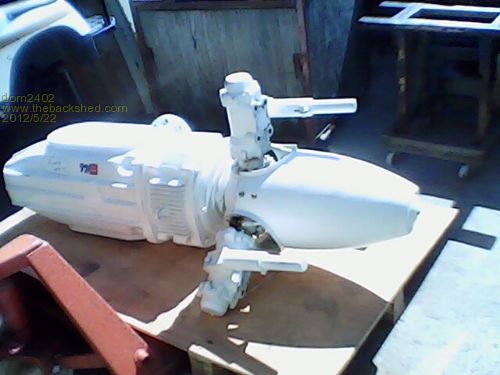
My 2 projects 5kw and 10kw china specials 500v output I picked up at auctions need to make some parts, and building the 5kw buckboost to 240v ac controller right now then have to work on the 10kw fun fun 


|
||||
| yahoo2 Guru Joined: 05/04/2011 Location: AustraliaPosts: 1166 |
It would have made your job easier if the auction house had sold the units as a kit, there is probably someone with spare diversion loads and controllers that were sold at the same auction. But how do you find them   I'm confused, no wait... maybe I'm not... |
||||
| domwild Guru Joined: 16/12/2005 Location: AustraliaPosts: 873 |
Good luck with those big monsters! What are you going to use for the props? Taxation as a means of achieving prosperity is like a man standing inside a bucket trying to lift himself up. Winston Churchill |
||||
| yahoo2 Guru Joined: 05/04/2011 Location: AustraliaPosts: 1166 |
Here's a few posts of the controller from the little turbine. The controller is fully self contained with inbuilt fans and diversion load in the back half of the box. It is quite a good design apart from one thing, in an attempt to go high tech the voltage adjustment for diversion is set via the LCD screen and touch buttons. It has given a high battery voltage reading from new that we have had to compensate for in the setup. I hoped it might be an assembly fault or a dry joint and stripped it down when it was new, unfortunately it wasn't that easy and I had no luck in getting a replacement circuit board so we put it back together and ran it until it died. which it did. stuck in the diversion mode and drained the batteries (all 24Kw). and blackened the sheet of marine ply it was mounted to. pics of the inbuilt diversion I'm confused, no wait... maybe I'm not... |
||||
| yahoo2 Guru Joined: 05/04/2011 Location: AustraliaPosts: 1166 |
two boards inside, bridge rectifiers on one and the other with the row of 5 transistors along the bottom, switching circuit, voltage sense circuit and the chip that runs the LCD. the second photo shows the back of the rectifier board, there is a couple of extra bits so that a couple of solar panels can be added but it is all pretty straight forward. I'm confused, no wait... maybe I'm not... |
||||
| yahoo2 Guru Joined: 05/04/2011 Location: AustraliaPosts: 1166 |
I am still a little confused as to what controls the running of the fan, if I can work that out I will wire a new controller into this box. I will post a couple of photos of the blades if I remember to take my camera next time, they really work well with this generator. cheers yahoo I'm confused, no wait... maybe I'm not... |
||||