
|

|
Forum Index : Windmills : Need advice on 2nd windmill project
| Page 1 of 2 |
|||||
| Author | Message | ||||
| MKHPhillips Newbie Joined: 08/02/2010 Location: Posts: 21 |
Hey Everyone, I came to this forum a few years ago for some good advice on my first windmill project. I am now working on my second windmill. I took a motor from a treadmill that we have not used in years. The motor is 8 pounds without the 2 pound flywheel. I'm hoping this will make a good windmill motor. Not sure if I should leave the flywheel on or not. I thought it might make it harder to start up in low winds. I'm also thinking of 2.5 feet long, 6" PVC pipe blades (3 of them). I would appreciate any advice & welcome you along the journey of my 2nd project. Here is the motor: 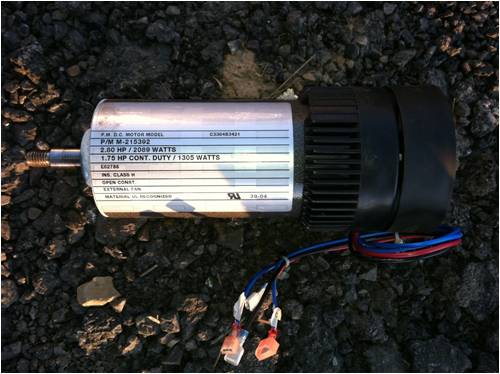
|
||||
| MKHPhillips Newbie Joined: 08/02/2010 Location: Posts: 21 |
There is a fan on the back side of the motor, that draws the air through (the black thing). It spins when the blades spin. I hooked a meter up & get about 22 volts & 13 amps. My drill slowed down when measuring the amps. I plan on working on it this weekend, so I will have more pics for you on Sunday. |
||||
| isaiah Guru Joined: 25/12/2009 Location: United StatesPosts: 303 |
What are the volt and rpm rating of this motor? if you take the rpm divided by the volts x 15 this will give you the cut in speed of the motor for charging a 12 volt battery. if you hook the motor up with a rectifier and battery for testing , if the battery is at full charge it will look like the cut in is a bit higher than these figures and if your battery is discharged the cut in figures will be pretty much as calculated. you want to look for something with 2000 rpm or lower and more volts and amps the better URL=http://www.motherearthnews.com/Renewable-Energy/1973-11- 01/The-Plowboy-Interview.aspx>The Plowboy Interview[/URL> |
||||
| MKHPhillips Newbie Joined: 08/02/2010 Location: Posts: 21 |
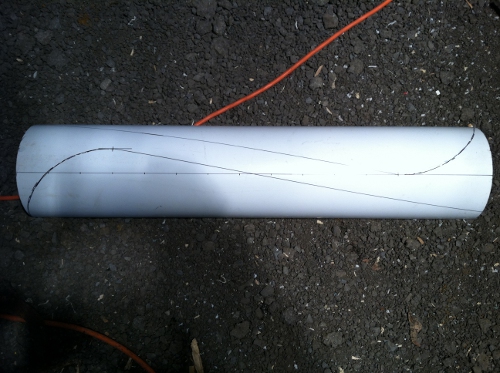
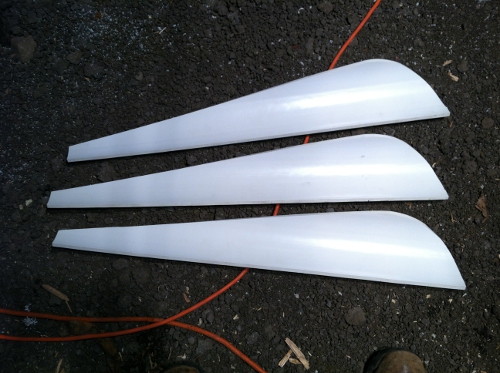
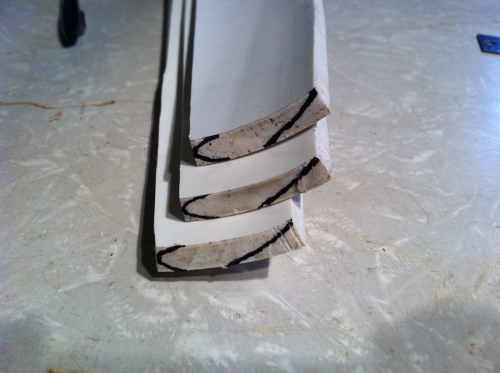
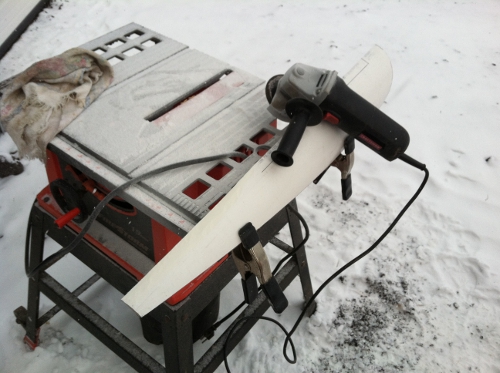
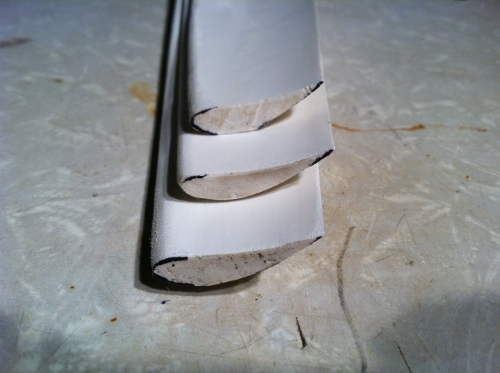
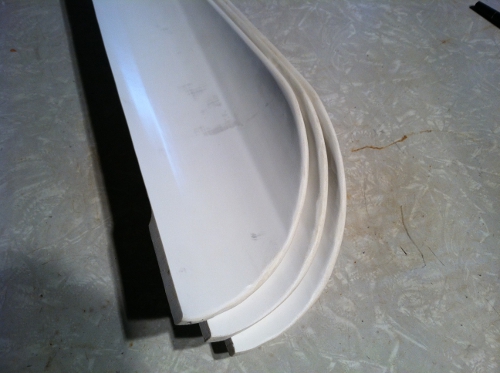
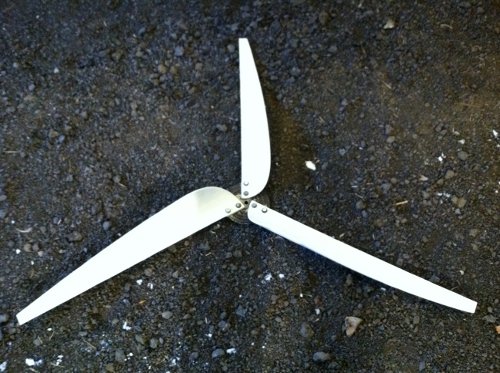
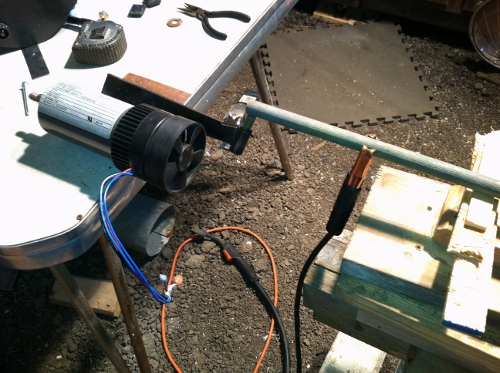
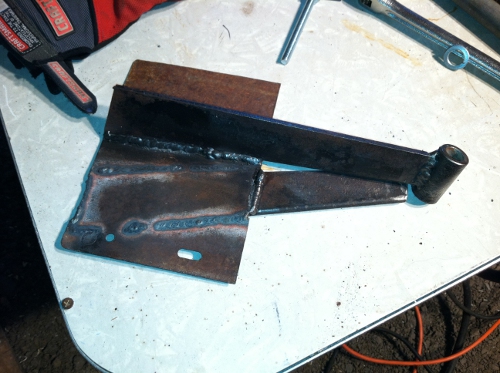
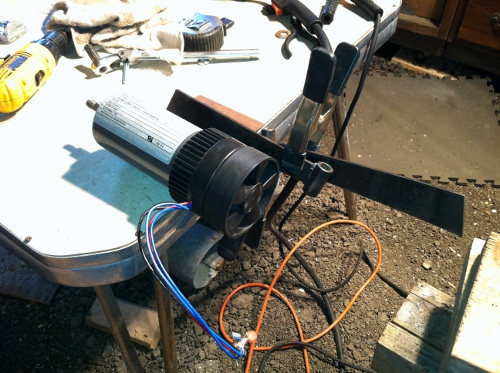
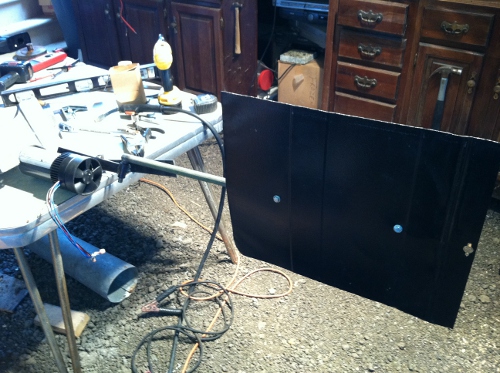
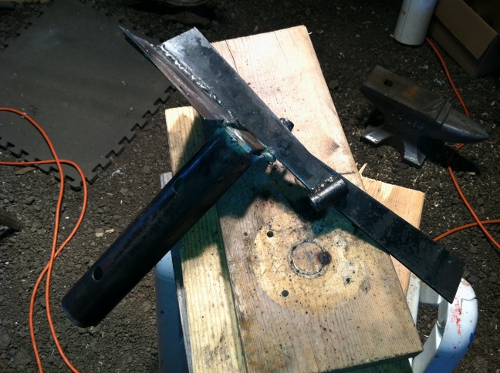
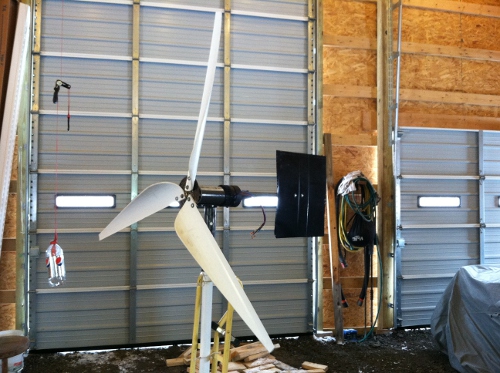
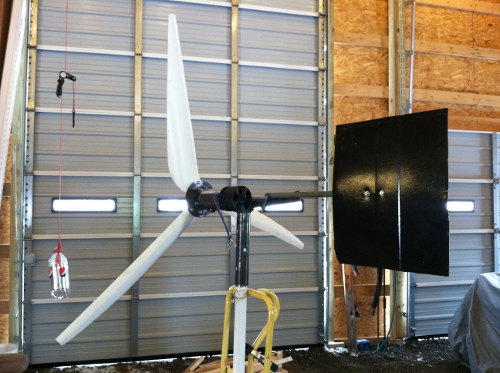
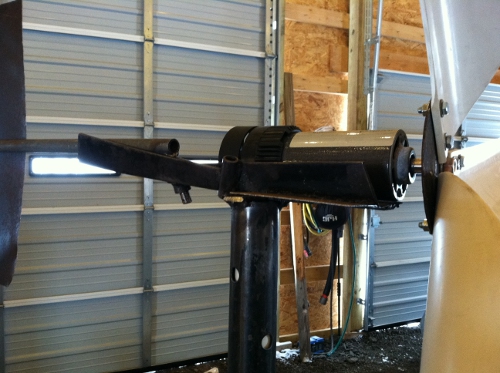
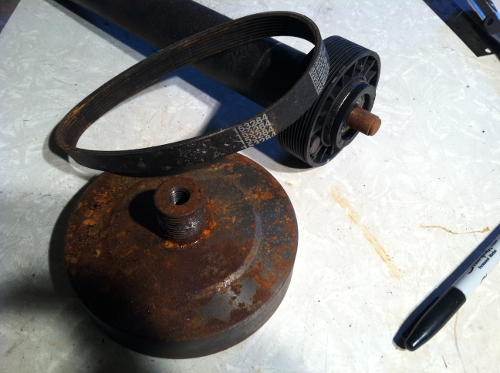
I accomplished some more this weekend. But I think the design will need to be changed. When I tested it in the wind, I was only getting about 7 volts. Therefore, something will need to change. I may need to gear the motor or have a different design for the blades. I had a basic idea of the design when I started, but I created things on the fly. If I do go the route of gearing the motor, I will use the small belt from the treadmill. If I go the route of changing the blade design, I was looking into some blades called Raptor. Please let me know if you guys have any ideas. Here are some pics from the weekend. 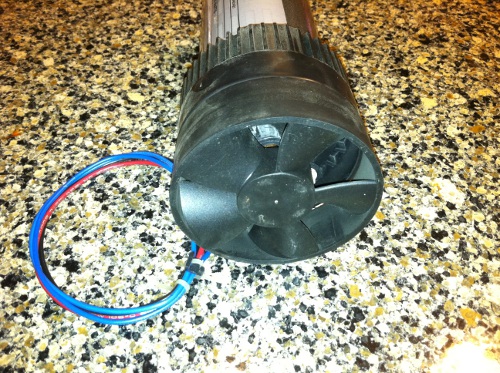
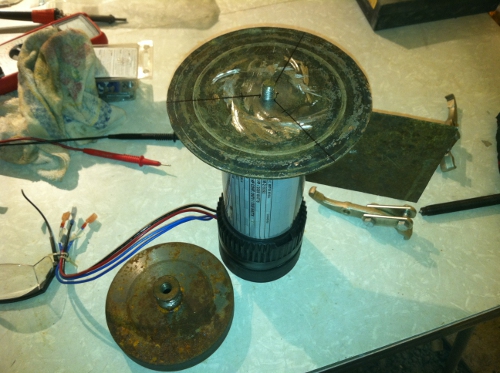
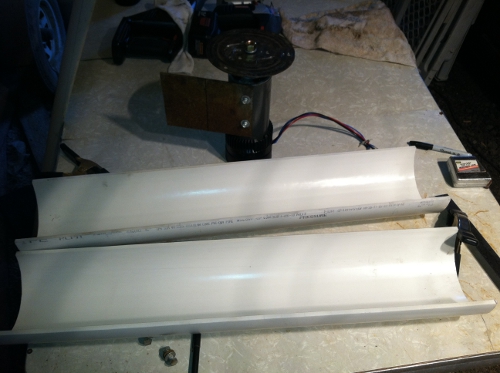
|
||||
| MKHPhillips Newbie Joined: 08/02/2010 Location: Posts: 21 |
and more pics. 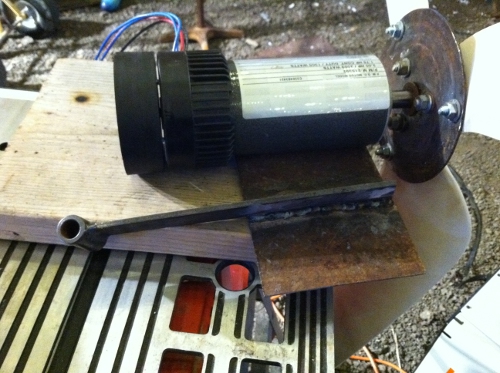
|
||||
| MKHPhillips Newbie Joined: 08/02/2010 Location: Posts: 21 |
Well, I have an update. I think I have an average RPM speed of the motor. There is a label on my cordless that shows 1500 RPM. With a fully charged battery, the motor gives 24.5 volts (no blades attached). I then removed 1 blade from the hub & the motor displayed 9.2 volts with 2 blades (using drill). Since I don't think this will work, I think my next step is to ratio the motor using the belt from the treadmill. I will work on it this weekend, so I will let you know how things go on Monday. |
||||
| MKHPhillips Newbie Joined: 08/02/2010 Location: Posts: 21 |
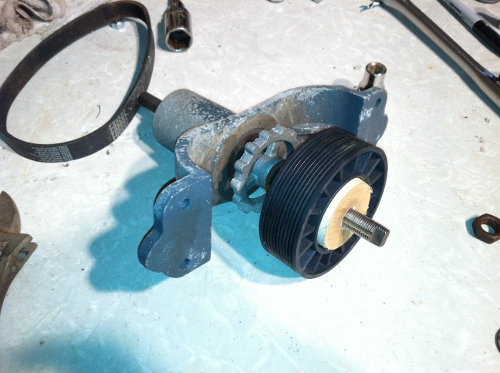
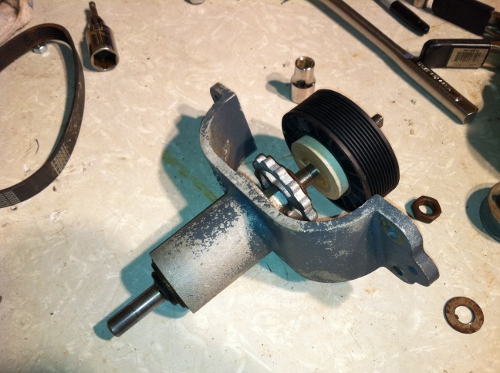
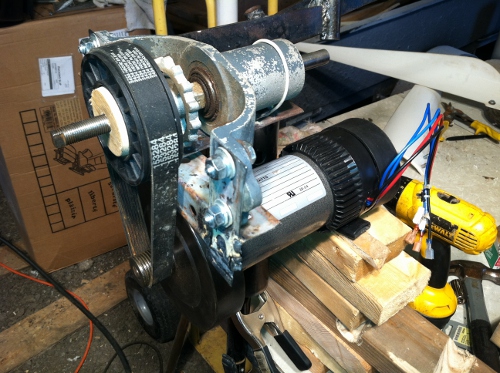
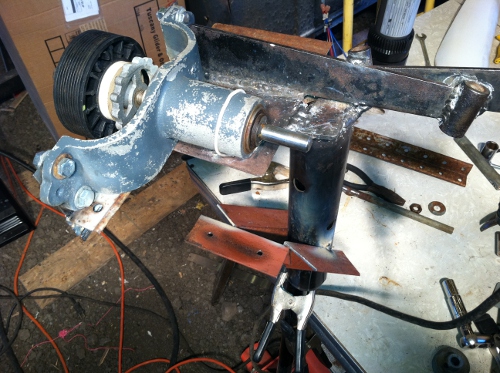
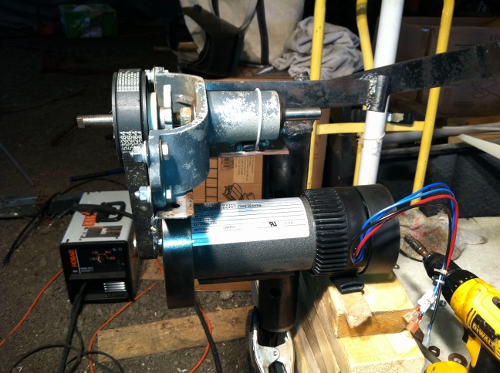
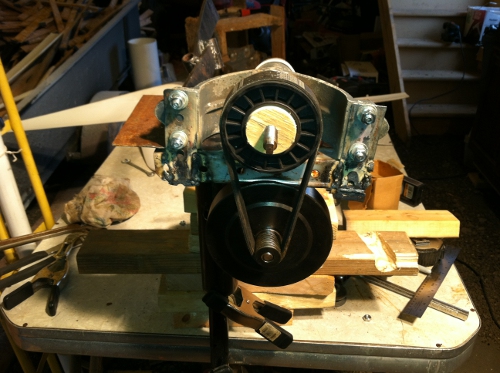
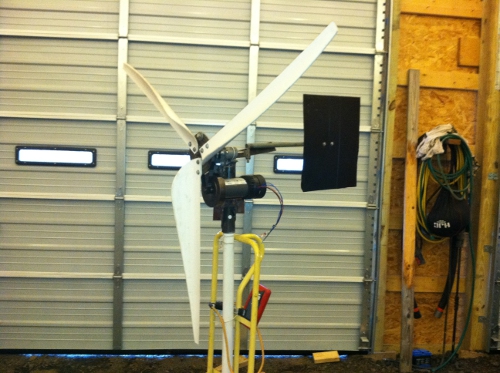
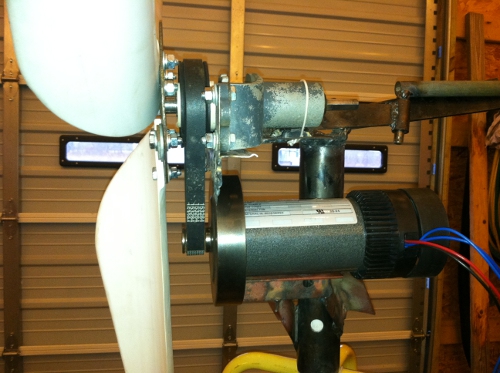
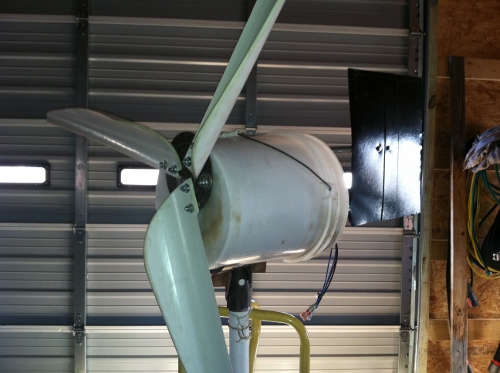
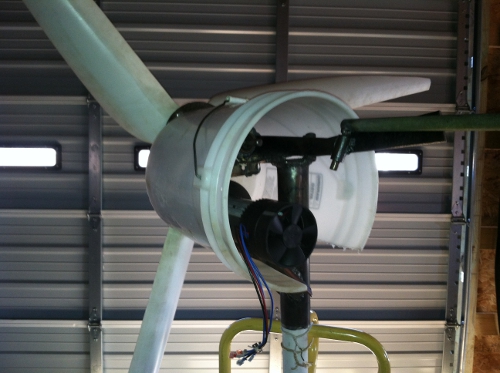
I think I finally got it. I used the belt to make the motor spin faster. I tested it and received about 20 volts in the wind. I think I managed to almost triple the output. With the drill (no blades), I was able to get 60 volts. Until I think of a different cover, I will use a plastic bucket to keep it out of the rain & sun. Next thing will be a tower. Here are some pics from the weekend. 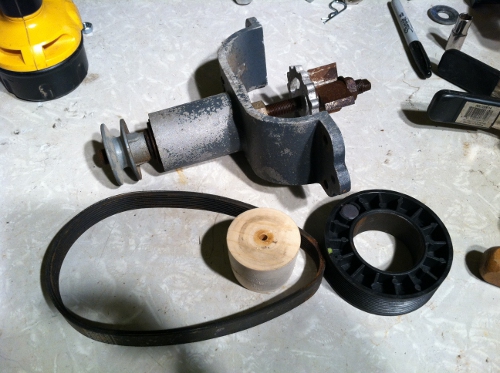
|
||||
| MKHPhillips Newbie Joined: 08/02/2010 Location: Posts: 21 |
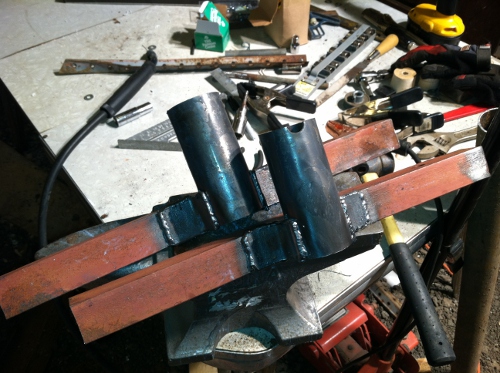
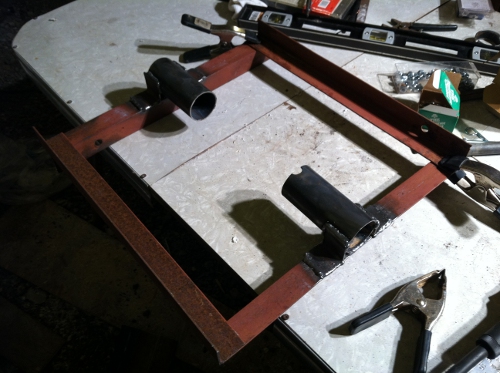
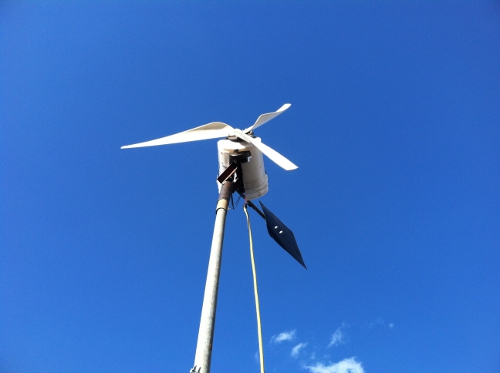
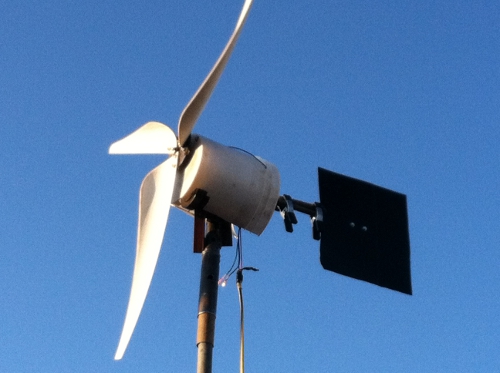
I am currently making the base for the 30 foot tower. Hopefully, the town does not get after me about the windmill & the height. Here is the progress so far. I managed to test the 5 foot windmill on a 14 foot tower (for my other windmill) and noticed a furling problem right away. The tail seems to be too light for the job. I added an old window weight (clipped on) and that seemed to keep it towards the wind better. 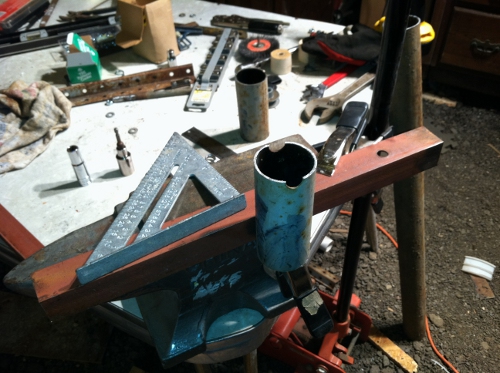
|
||||
| Gizmo Admin Group Joined: 05/06/2004 Location: AustraliaPosts: 5078 |
Interesting project, and nice work on the blades. I would suggest ( recommend )you strengthen the blade mounts to the hub. There is a lot of stress at that point and I fear the two bolts wont hold the blade. I would use a short length of flat steel on both sides of the blade, making a sandwich with the blade in the middle. You may need a bigger diameter turbine to drive the motor up to speed, but it depends on your local wind conditions. Keep us posted on how it goes. Glenn The best time to plant a tree was twenty years ago, the second best time is right now. JAQ |
||||
| MKHPhillips Newbie Joined: 08/02/2010 Location: Posts: 21 |
Thanks for the advice Glenn. I agree, I will probably add some steel to the blades and may make them bigger as well. I live in Farmington, NY. |
||||
| MKHPhillips Newbie Joined: 08/02/2010 Location: Posts: 21 |
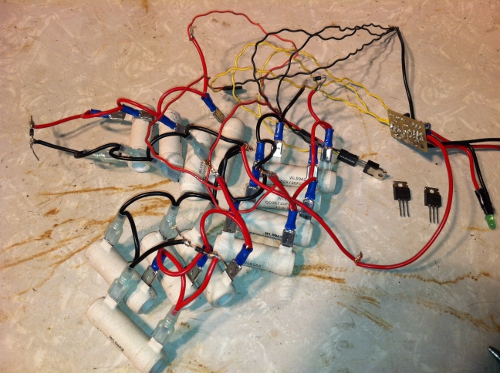
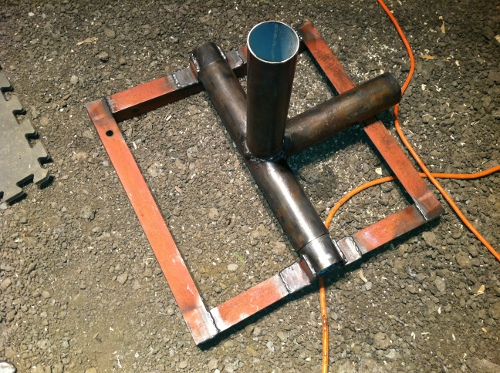
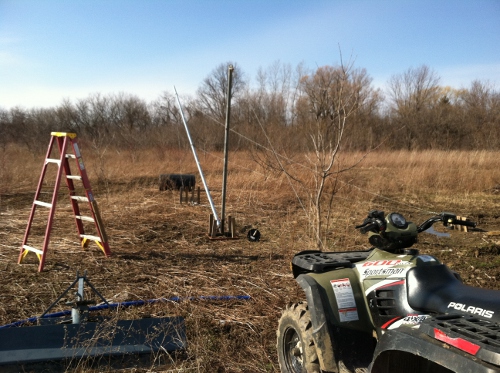
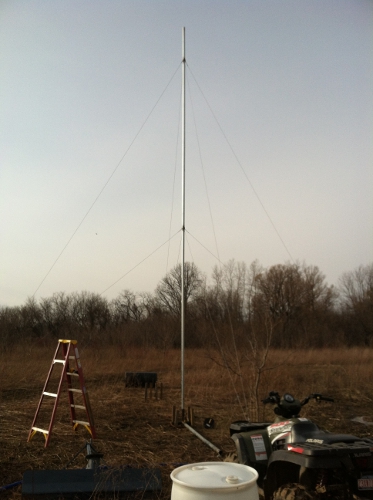
I got the tower base all welded up. As far as the guy wires, I welded strap buckles (to hold plywood together) onto the poles. Since the tower will be 30 feet, I welded the first set of four 27 feet high and the second set of four at 13.5 feet high. Also, I created some strange looking anchors (4 stakes screwed together). They worked on my other tower, so I decided to try it again. Throughout this windmill building process, I was also working on a dump controller. After scouring the web and not wanting to spend a few hundred dollars, I ended up buying a kit from ghurd in 2010. I did not have the ability to use it until now (built our house in 2010). When I tried to put the kit to use, I noticed immediately it was not behaving correctly. Instead of buying another unit, I decided to contact ghurd to see if he had any ideas. Let me tell you, I felt very confident when I received a kind/positive email back from ghurd. Even though I bought it 2 years ago, he guaranteed that we would get it up and running. After trying a few suggestions from him, the problem (2 bad mosfets) was discovered and I was back in business. He went above and beyond by sending me 3 new mosfets free of charge. Bottom-line, if you need an inexpensive/reliable dump controller, get it from ghurd. I was very impressed with his customer relations. Here are some pics from the progress so far. 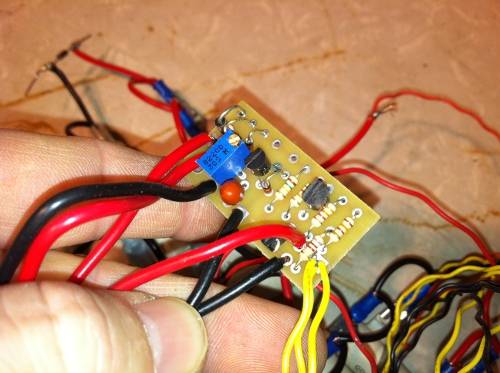
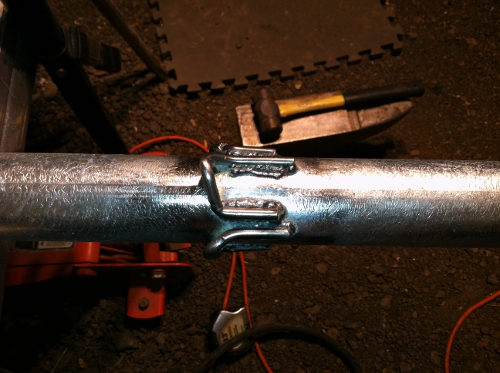
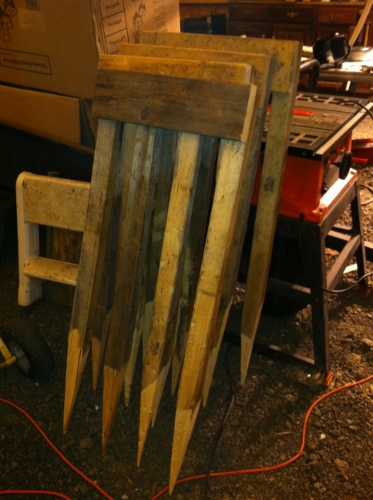
|
||||
| isaiah Guru Joined: 25/12/2009 Location: United StatesPosts: 303 |
Hi I see in the 4 th picture down on your blades it looks like the layout lines to cut them out how much did you off set the tip of the blade from the parallel line of the tube? Yes gizmo is right you need something where your bolts are on the blades. . This is where they will crack . I have used plastic 3/4 X 1/4 as long as the bolting area. One set I made out of regular pvc I used some of the scrap pvc to make the over lay strips and used washers. Other wise it looks good. URL=http://www.motherearthnews.com/Renewable-Energy/1973-11- 01/The-Plowboy-Interview.aspx>The Plowboy Interview[/URL> |
||||
| MKHPhillips Newbie Joined: 08/02/2010 Location: Posts: 21 |
Hey isaiah, take a 6 inch pvc pipe and cut it in half. For the tip, I measured 1.5 inches from the cut side. The 1.5 inch tips are displayed in image 7 from the top. |
||||
| isaiah Guru Joined: 25/12/2009 Location: United StatesPosts: 303 |
Thank you A comment on your tower base when I was in the signal corps we had radio towers similar to yours and the base was just a plate with 4 holes in the corners and we had what looked like giant nails we drove in the ground.These never gave us any trouble. The military tower would come apart in sections and had a case and one person could carry most of it off.those could go to 60'. Just a thought as the steel rods would last longer than the wood. Your doing a good job on it so far let us know how the gear up works when its up in the air? You may have to play with the tail some to get to behave like you want. The stakes I spoke of could be made out of cement rods and some washers welded on the top side, if you have a lathe you might want to make something heaver than washers. Good luck Isaiah URL=http://www.motherearthnews.com/Renewable-Energy/1973-11- 01/The-Plowboy-Interview.aspx>The Plowboy Interview[/URL> |
||||
| MKHPhillips Newbie Joined: 08/02/2010 Location: Posts: 21 |
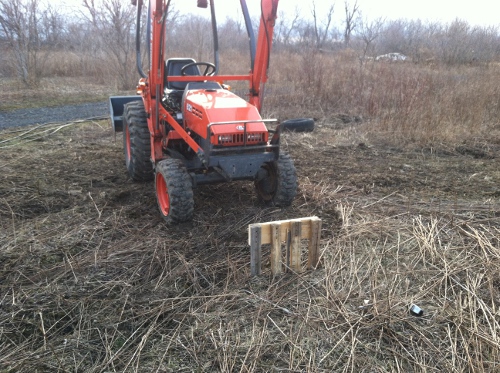
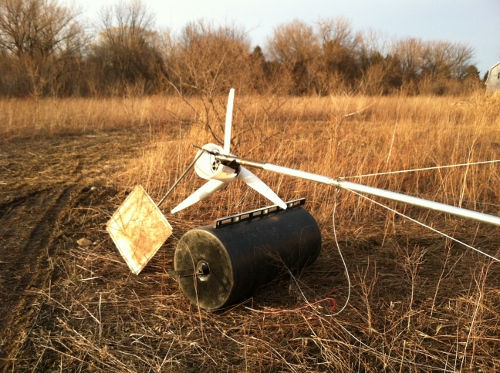
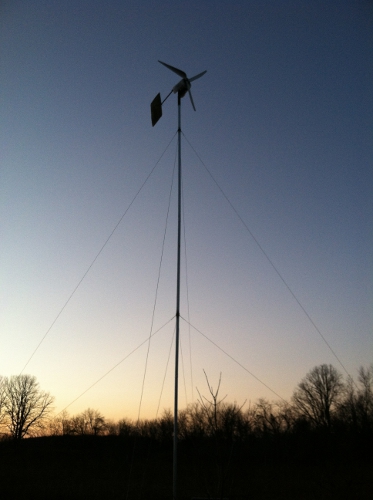
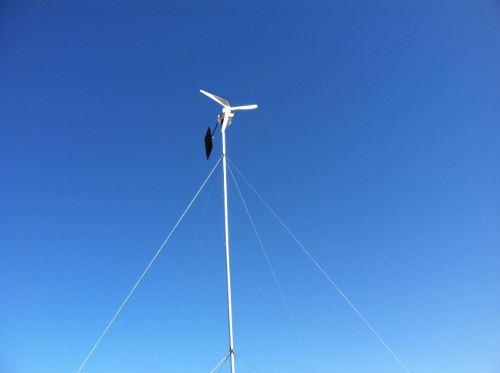
It is up & running, on its final resting point. I made the tail a little bigger & longer. I also did a test run of the tower, before I put the windmill on. I will let it fly a few weeks, to see how it behaves. 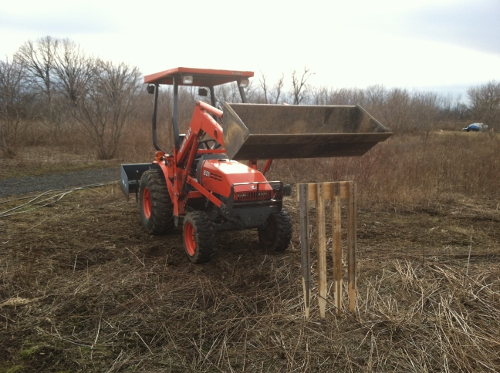
|
||||
| rissole Newbie Joined: 10/05/2011 Location: AustraliaPosts: 15 |
I have just read this thread; I looks like a great project, well done! keep us posted Rusty |
||||
| Dubyagee Newbie Joined: 15/06/2007 Location: United StatesPosts: 21 |
Nice Regards, Dubyagee |
||||
| bvan1941 Newbie Joined: 06/05/2010 Location: United StatesPosts: 24 |
MKHPhillips, CONGRATULATIONS !!! Makes you feel great just looking at it go around, regardless of the output- hunh? Keep going were all rooting for you. Bill Bill |
||||
| Gizmo Admin Group Joined: 05/06/2004 Location: AustraliaPosts: 5078 |
Good to see it up in the air MKHPhillips, well done getting this far. You'll learn a lot over the next few weeks, watching how it behaves in different conditions, and what breaks ( something will, always does  ). ).
Keep a safe distance during strong winds until you feel confident its going to hold together, I've had a windmill throw a blade in the past. Glenn The best time to plant a tree was twenty years ago, the second best time is right now. JAQ |
||||
| isaiah Guru Joined: 25/12/2009 Location: United StatesPosts: 303 |
Yes a thrown blade can be very dangerous and so the rest of the mill as this throws things out of balance. My son had one come off in a hi wind storm and it shook the daylights out of the mill and tower. I was scared to get close to it and I rounded up some wire and a weight and attached it to the wire and when we got a slight break in the wind I was able to through it over the remaining blades and hub and was able to stop it. '  ' '
The other two blades had cracks in them and one was just about to let go also. This is why I recommend the over lay where the bolts go through the blades into the hub.'  ' '
Be safe and Enjoy. Isaiah URL=http://www.motherearthnews.com/Renewable-Energy/1973-11- 01/The-Plowboy-Interview.aspx>The Plowboy Interview[/URL> |
||||
| Page 1 of 2 |
|||||